
While making the sample for the upcoming Halloween tote bag release, I'm discovering a lot of things about the printing/pressing process I thought would be good information to share with others! First off, the materials I'm using:
Materials/Supplies
- FancierStudio Heat Press, $170-$200 For pressing t-shirts and other typical garments, you'll want a heat press that can go up to at least 400F and has an adjustable pressure knob. (205C)
My immediate thought was, "Is this necessary? Can't I just use my iron?" The answer is YES, it is necessary and NO, a home iron is not going to get the job done. It may work for a shirt you only want to wear once for a costume or a gag gift, but to get your image to professionally and permanently stick, you need a heat press. This thing will get much hotter than your home iron ever will, (this particular model goes up to about 430 degrees F.) and it also applies intense, even pressure - both of which are the key to getting your image to stick.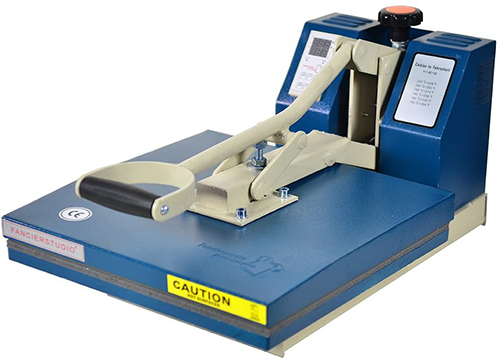
- Neenah 3G Paper, $40-$45/pack After watching several Youtube videos and reading multiple reviews Neenah was the brand that kept coming up as one of the best papers for home printing when it came to garment graphics. (another brand that was frequently mentioned was Paropy, it just happened that Neenah was slightly cheaper so that's the one I'm trying first) My experience years ago when I first tried home heat transfer papers was mediocre at best, but this was several years ago and it seems like the technology has come a long way!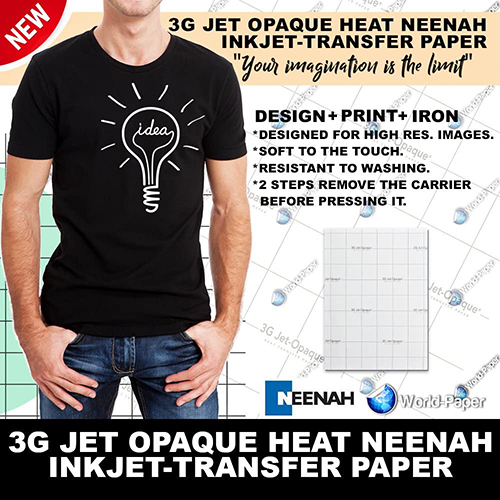 - Infared Thermometer, $25-$50 For checking your heat press temperature. You need to be sure your heat press is heating up evenly, and at the temperature it says it is. When pressing garments, if heat is applied unevenly (or not hot enough) the image won't stick entirely and will start to peel off, so that's no good! To accurately measure your heat press, you need to take the temperature in 4 to 5 different spots on the machine. TroyTube has an easy-to-follow, quick video showing the method.
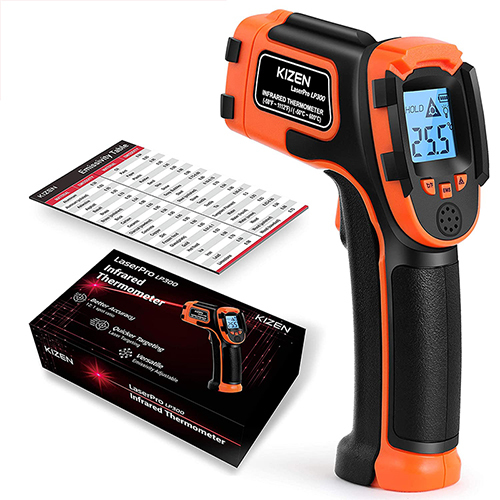 - Teflon sheet; (mine was included with the heat press) for placing in-between your printed graphic and heat press. If you don't use this, your graphic will just stick to the top of your heat press, creating a sticky gummy mess.
- Thin plywood board; not 100% necessary, but I found this was handy to have for my canvas bags, which are made from thick cotton canvas and had several wrinkles in them when I bought them. I cut the plywood to be just slightly smaller than the bag opening, then placed it inside the bag and pressed. Having a flat, hard surface really helped to get out the last few stubborn wrinkles.
- Inkjet printer; for printing your graphics. The Neenah paper is made to be used in a home inkjet printer, the one I have is a Brother "Business Smart Pro Series" purchased a few years ago. When printing your graphic, I found it's best to set your printer properties to print quality "best" and paper quality to "normal."
My Process
After a few weeks of trial and error, here's what I found works best.
Wash and dry your t-shirt (or whatever you're printing on) first.
Set your heat press to 365 degrees and 20 seconds. (this is for 100% cotton garments - if you have a cotton/poly mix the temperature may need to be adjusted.)
Place the t-shirt on your heat press with the plywood board inside the shirt.
Press JUST THE SHIRT, no graphic. This is to iron it and get it completely flat and wrinkle free.
While it's cooling, print your graphic.
Set your printer to print quality "best," and paper quality to "normal."
Cut out the graphic. Get as close to the edge as possible. Any paper left behind that does not have part of the image on it will stay white when pressed to the shirt. (with the specific paper mentioned above, you do NOT need to mirror your graphic)
Place the graphic on your shirt with the plywood board still inside the shirt.
Place the teflon sheet on top of the shirt and graphic.
Set the heat on your press to 365 degrees F and press at heavy pressure for 40 seconds.
Let sit for 24 hours.
Wash on gentle cycle in cold, hang to dry.
Now we're going to press a second time to make sure the graphic is absolutely stuck down! (this may be overkill, but I want to make 100% sure it's not going to start peeling)
Set your heat press again to 365 degrees and 40 seconds.
Place the t-shirt, (board inside) graphic side facing DOWN and teflon sheet in between inside your press.
Press a second time for 40 seconds.
Let sit for another 24 hours.
After this process your garment should be good to go! For subsequent washes, be sure to continue to wash in cold and hang dry.