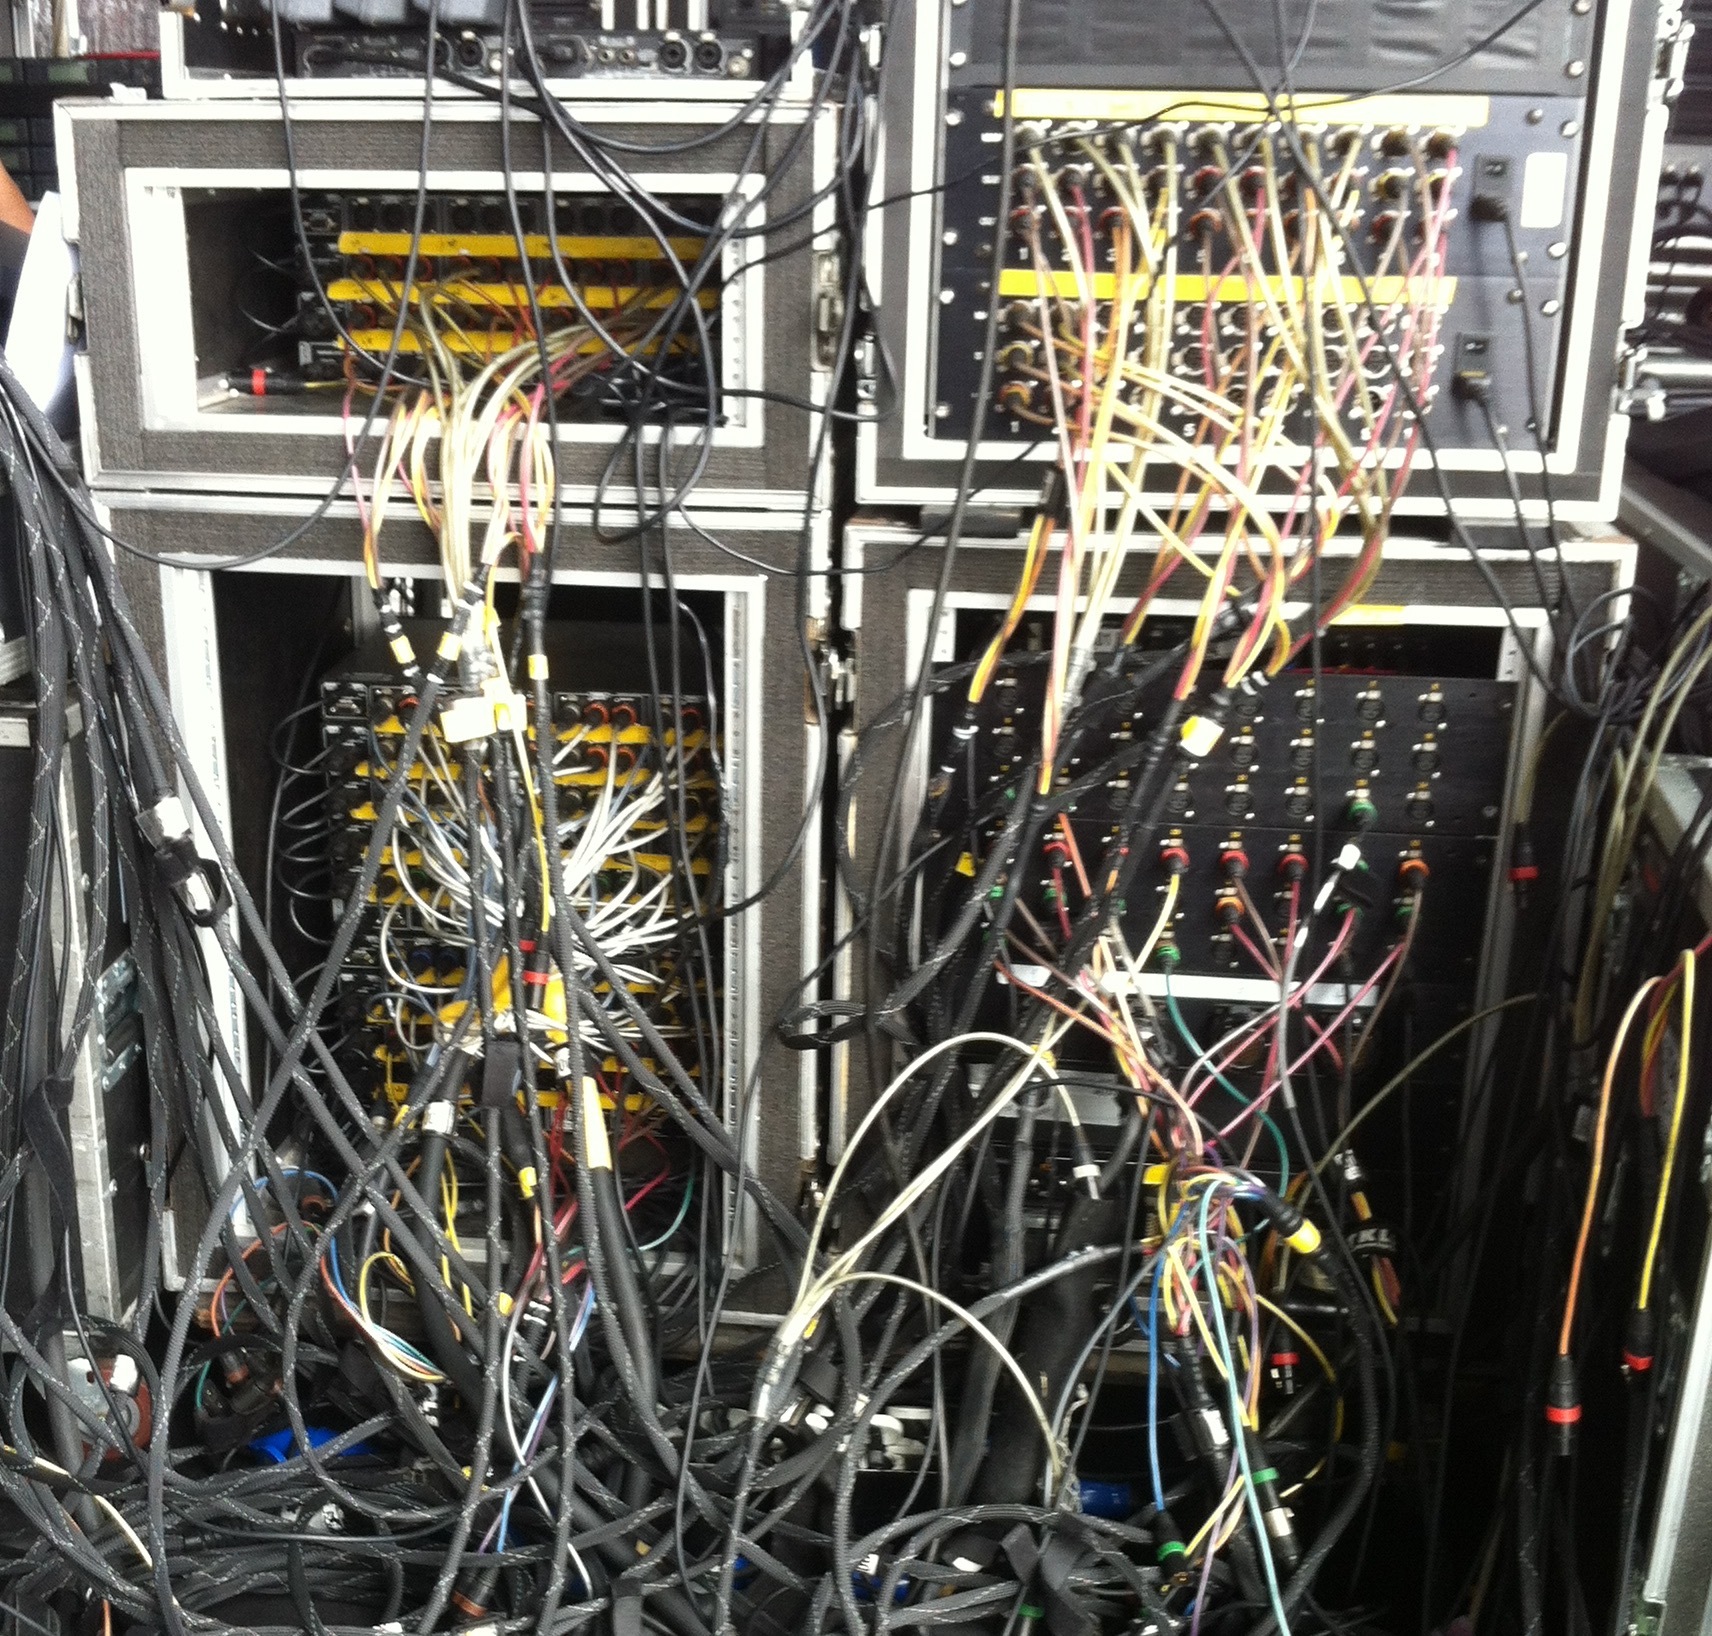
 MuSOS imparts some quick Cabling + Plug In Tips.
It’s easy to plug in a cable and get something working, but once that becomes 8 cables or more, plus powered devices and a variety of equipment, both racked or desktop, it’s easy to end up with a ‘rats nest of doom’ that looks a mess on stage and is impossible to fault find (As above!!)
Here’s some basic tips that will work well in any studio or live scenario and help speedy setup and take down, plus quicker problem solving…
If you need to swap out or power cycle a piece of equipment, you need to know which one to unplug!
Label 4 way power board connectors + power cables. Label the actual plug. White on Black label from something like a Brother or P-Touch label gun is clear and discreet. Not got a label machine ? Then PVC tape and a sharpie pen will do it!:
https://www.amazon.co.uk/Brother-P-Touch-Labeller-Keyboard-Handheld/dp/B01MUGSVHY/ref=sr116?dchild=1&keywords=p+touch&qid=1611311704&s=officeproduct&sr=1-16
Then cover the label with clear tape to protect and keep the label on there: https://www.amazon.co.uk/Fixman-192545-Weather-Resistant-Clear-Tape/dp/B00FHXGV2G/ref=sr_1_12?dchild=1&keywords=Clear+Marly+Tape&qid=1611312233&s=officeproduct&sr=1-12
Label cable ends and heat shrink clear over the connector end labels to protect.
As previously mentioned, it helps ID cables when setting up and also if a cable becomes unplugged .. You know where it’s from, plus the heat-shrink means labelling lasts.
Although the previous point is good practice – You don’t have label both ends of every single cable you use, it might take forever!
You can ‘number’ cables or groups of cables instead and keep a note of the numbers. This saves time on labelling each connector, especially in a rack where you might not be able to see ends clearly anyway.
Tape together multiple cables that run from the same place to same destination. Saves plug-in time.
If a bunch of audio cables all go in the same direction, can you save time by taping them together? It’s also neater and less of a trip hazard. Also making use of a ‘loom’ might be easier and quicker if several all go the same destination. Keeping audio, data and power cables separate from each other if doing this is recommended though. Audio and power cabling when in close proximity to each other can sometimes induce noise in the audio lines. Employing the use of balanced connections when possible will help to keep noise levels to a minimum.
When plugging in a pair of cables to something like a stereo synth, put a bit of tape on the L or R connector or cable to indicate it’s a particular side.
This speeds up setup time as well as ensuring L and R don’t get swapped. Obviously do the same at both ends!
In tandem with the previous tip: Put a label or dot over the L or R socket on the actual instrument if stereo, or even if it's a single mono output.
Again this speeds up setup and means you don’t have to read in low light, often the case on stage. In fact this really comes into play if you have to fault find on a dark stage. Reading the back of a synth to see which O/P is which might not be easy !. Also there might be several jack O/P's on the back of an instrument, so knowing which is the correct one in an instant is important. Fluro or luminous tape can be invaluable here:
https://www.amazon.co.uk/Fluorescent-Luminous-Self-Adhesive-Decoration-Christmas/dp/B086JHKJX6/ref=sr116?dchild=1&keywords=illuminous+tape&qid=1611314787&s=officeproduct&sr=1-16
Taping cables together inside racks can neaten up and make it easier to see the rear of units.
Especially after transit it’s good practice to check the security of connections, not very easy if you have to look through a sea of cabling. Also employing the use of re-useable cable ties makes cable removal or changes to the plug in plan much easier:
https://www.amazon.co.uk/Yull-Store-Colorful-Adjustable-Reusable/dp/B07S4BN7PP/ref=sr12_sspa?dchild=1&keywords=re-usable+cable+tie&qid=1611313667&s=officeproduct&sr=1-2-spons&psc=1&spLa=ZW5jcnlwdGVkUXVhbGlmaWVyPUEzU0JBSk1IOTY0TE5PJmVuY3J5cHRlZElkPUEwNzU2MzgxSzI4VkVRNElTV0JQJmVuY3J5cHRlZEFkSWQ9QTA3MzYyNjAyWjZVTjlWRjhGRTJYJndpZGdldE5hbWU9c3BfYXRmJmFjdGlvbj1jbGlja1JlZGlyZWN0JmRvTm90TG9nQ2xpY2s9dHJ1ZQ==
Tape up extra/slack cable to a PSU
If there’s a lot of extra cable on the trailing lead of a power supply it keeps rack internals clearer. PSU’s can also be taped or cable tied to the plugboards they plug into. Your rack may well end up upside-down in transit and heavy PSU’s will fall out otherwise. In tandem with this securing the power blocks or 4 ways that these PSU's actually plug into is also necessary. The 'roadies' secret weapon is 3M 'Dual-Lock' a heavy duty Velcro style sticking system, thats re-useable but capable of securing very high loads. Its in every touring rack!:
Put a label above or near the area of a connector, to say where the other end of the cable terminates..
Useful when looking in emergencies. In systems where cables are not unplugged daily this makes sense and is easy to do and helps in a moment when you are thinking 'Where does the other end of this go?!'
That’s it for this quick post, more cabling quick tips coming soon, where we'll go deeper into connecting longer cable runs and recommend cable types, suppliers and connections.
Also checkout some of our other Quick Tip / Fault Finding posts for similar swift nuggets.
And of course don't forget to visit https://musos.tech for direct 1:1 tech assistance from the MuSOS hive :)
//MuSOS - 'We Can Help'
