
On this occasion I want to share a complete tutorial on how to make a backend using Google Sheets. As a first step, of course, you have to create a Spreadsheet file on your Google Drive. So that you can understand properly the header should be able to follow the example I provide in the image below.
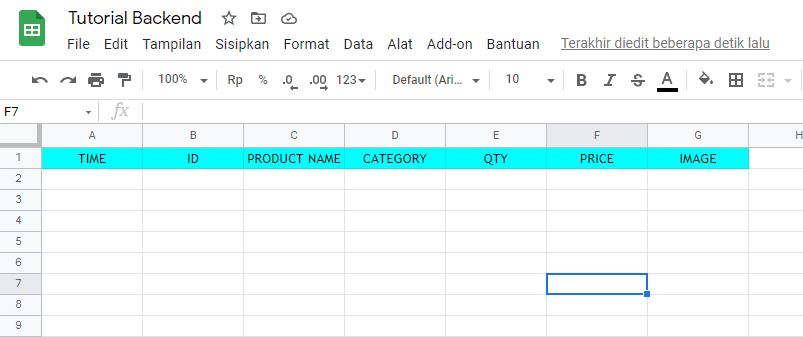
As you have seen in the picture above, I created a header with column A: TIME, column B: ID, column C: PRODUCT NAME, column D: CATEGORY, column E: QTY, column F: PRICE and column G: IMAGE. Next, after you create an example, we can start creating a script with the JavaScript language that will be the backend.
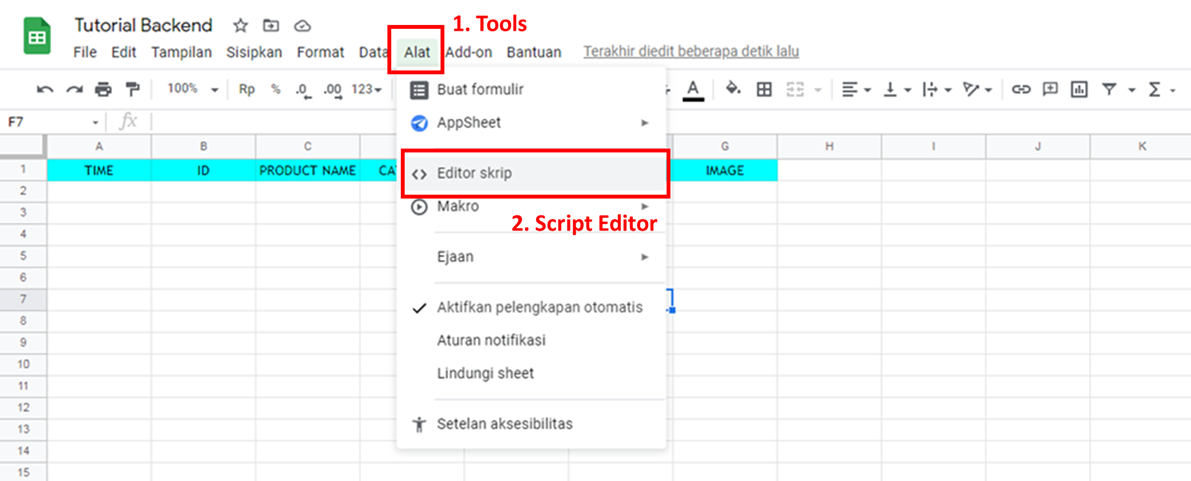
The next step is to create a Script by looking for the Tools menu on your spreadsheet page, then looking for the Script Editor option and clicking on that option which will open the Script Editor page.
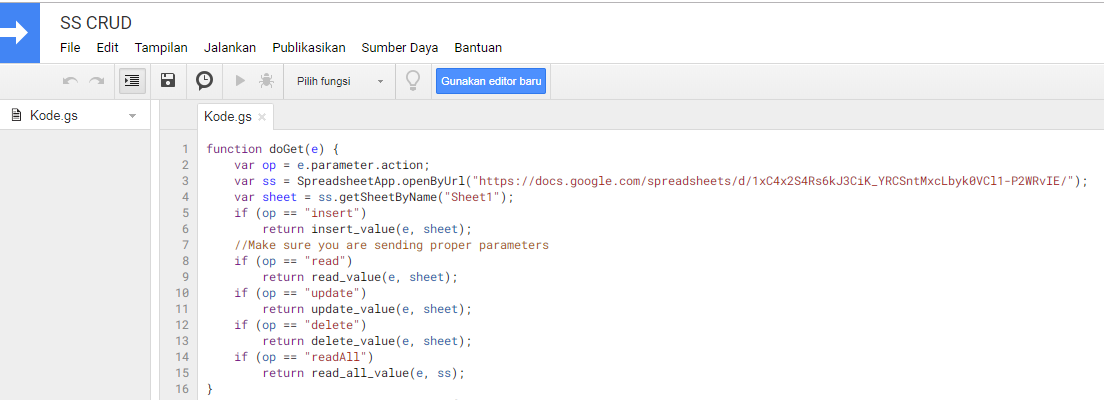
We start typing the script code, first we create a GET function with 5 choices of actions.
We make an insert action which is for the function of adding data,
The read action is to read a single data,
The update action is for the data update function,
The delete action is for the function to delete data based on the data id, and
The readAll action is a function that reads all of the data in the spreadsheet.
For example code, you can copy below;
function doGet(e) {
var op = e.parameter.action;
var ss = SpreadsheetApp.openByUrl("CHANGE WITH YOUR URL");
var sheet = ss.getSheetByName("Sheet1");
if (op == "insert")
return insert_value(e, sheet);
if (op == "read")
return read_value(e, sheet);
if (op == "update")
return update_value(e, sheet);
if (op == "delete")
return delete_value(e, sheet);
if (op == "readAll")
return readallvalue(e, ss);
}
After we have finished creating the GET function and in it we create the C.R.U.D (Create Read Update Delete) function, then we create a script for each of these functions.
INSERT or CREATE function
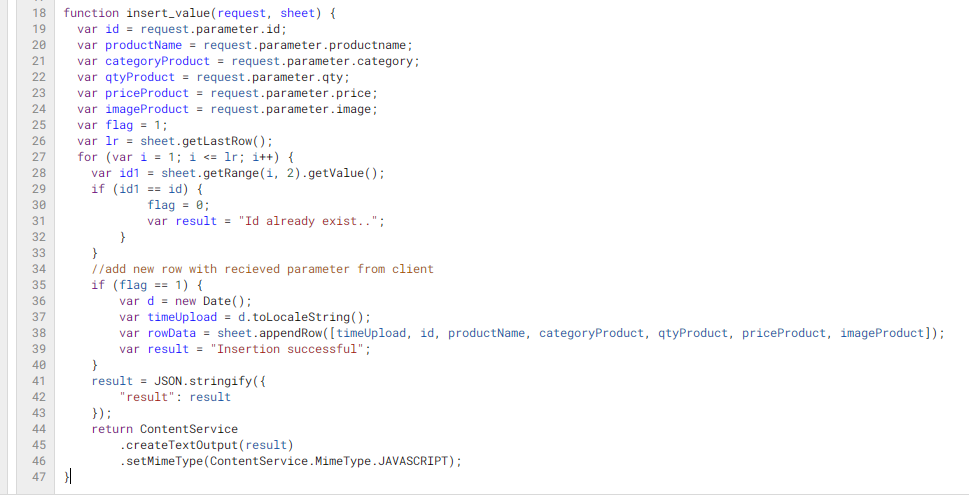
The explanation that needs to be paid attention is that lines of code 19 to 24 are parameters for making data in accordance with the header. So make sure you understand this code well, if the additional data is header data in the column then you also have to add the parameter code.READ function (for single data)
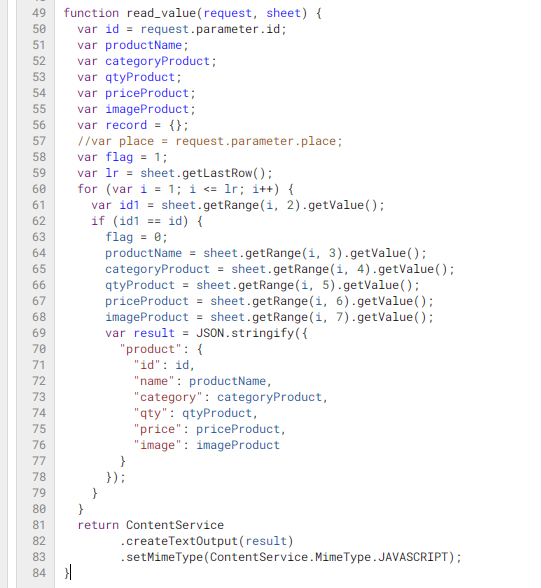
The explanation is on code line 50, the READ function on this single data needs to identify the ID of the data you want to read. After the ID is found, then you pay attention to the line code 64 to 68, where the data in line with the ID will be taken and displayed in JSON format with line code details 70 to 77.UPDATE function
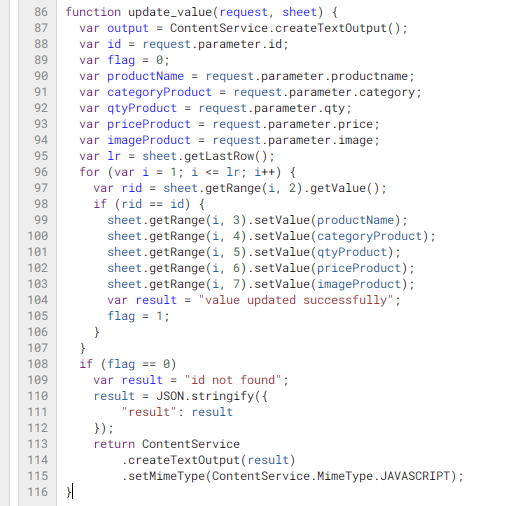
The explanation is almost the same as the INSERT function, but here the difference is that ID is only a parameter to find data and is not changed.DELETE function
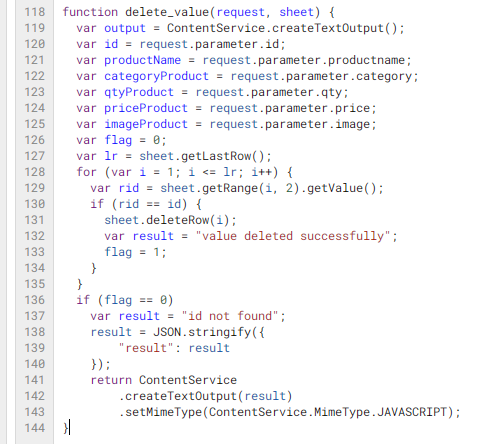
The explanation is for the DELETE function such as update, while the code lines 121 to 125 are actually only optional because only the ID parameter is used.READALL function
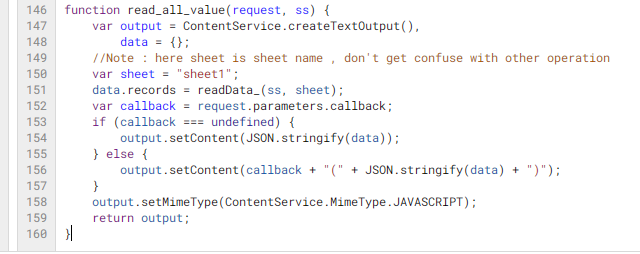
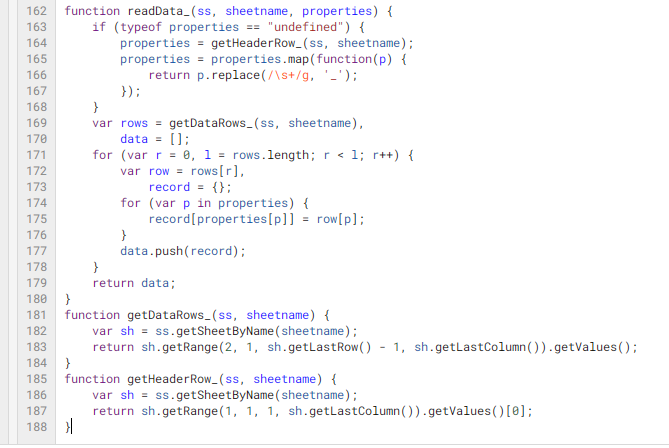
The explanation for the READALL function is the simplest, because in essence it reads all the data in the Sheet based on the Header.The final code we have to make property read data based on Header and Row
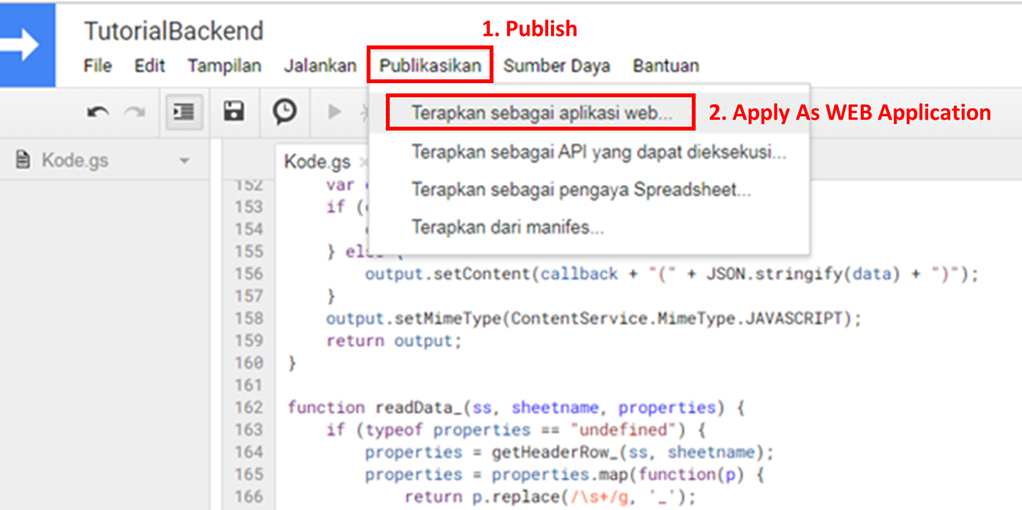
If all the code has been created don't forget to SAVE it, and then we publish this script to get the backend URL link. The method is on the menu, look for the PUBLISH option then select Apply As WEB Application.
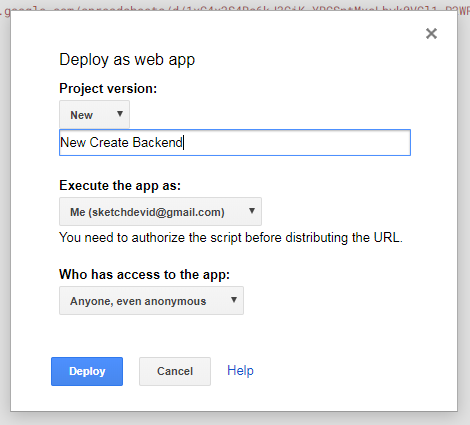
Then a dialog will appear for the authorization of the Script that you want to make the backend. You just follow as shown below
The tutorial is complete, hopefully useful and look forward to the continuation of this tutorial which will review how to apply this backend to the frontend with Sketchware projects. For the complete code that I convey above you can see on my GITHUB by clicking this : FULL CODE