
Taking a picture is easy. With a camera in our pockets all the time, it makes it even easier. But creating an image is much more difficult. For me there's a difference between the two. I consider taking a photo to be more of snapshot. The snapshot could be of a group of friends or family, wildlife, a building, or something that just catches your eye. There's nothing wrong with that as a way to document that moment. I've taken thousands of snapshot images with my phone and for a lot instances, it's not that big of deal if the image is just a snapshot.
However, when it comes to my landscape images, I always try to create an image with feeling or a purpose. The image could be technically sound, with perfect exposure, a nice composition, and pin sharp, but is still missing something. Like Ansel Adams once said, “I believe there is nothing more disturbing than a sharp image of a fuzzy concept!” If my image isn't saying something, then whats the purpose? With my best work, I always hope my image evokes a certain feeling or emotion. This can be much harder said than done. I've taken hundreds of photos myself that lack the feeling, most of which are tucked away on my hard drives. While composition is still very important, it's not the only thing that makes an image. In this blog, I don't intend to talk too much about composition since that could be a whole other talking point for another day, but just note that without a proper composition, it will be difficult to create an image of purpose.
There are multiple ways you can turn a snap shot into something a little more. The first way is to be familiar with the location. Take photos of your local scenery, and observe the way the light interacts with the landscape. Does this scene work better as sunrise shot or is better suited for sunset? It could even work as a mid day image. Then once you understand that, go back to that location multiple times. Every day will yield different results. There's a tree in downtown La Crosse that I find really unique. It almost has a banzai feel to it. I took a photo of it one day. It was later in the day and light was decent, but I was never really happy with the image. It's just kind of a photo of a tree. It's more a of document than it is an image. You can see downtown La Crosse in it, but the photo really isn't saying anything. It's a perfectly fine image. The composition is nice and the subject(the tree) is interesting, but it's just lacking something. Here's the image:
Now compare that to this image.
You can see the difference. The foggy image evokes more of a feeling. There's mystery and some mood to the photo. The tree also has just a touch of light hitting the leaves which brings a bit more attention to the main subject. the first image has a lot more contrast due to the time of day it was taken. This leads to a more chaotic image. Your eyes don't really know where to look.
The image on the bottom works much better because of one thing. Fog. Fog helps to simplify the scene. No longer do you see distracting elements surrounding the tree. While you can still see some buildings in the background, they aren't distracting and don't take away from the feeling of the photo. Both images have roughly the same composition with approximately the same focal length, but one stands out more than the other.
Another way to create a more impactful image is using the correct lens. I understand the lenses can be expensive and not everyone has all the lenses they need. But let's just pretend you have an extreme wide angle lens(14-24) mid range zoom(24-70) and a telephoto(70-200). Every scene calls for a different lens choice.
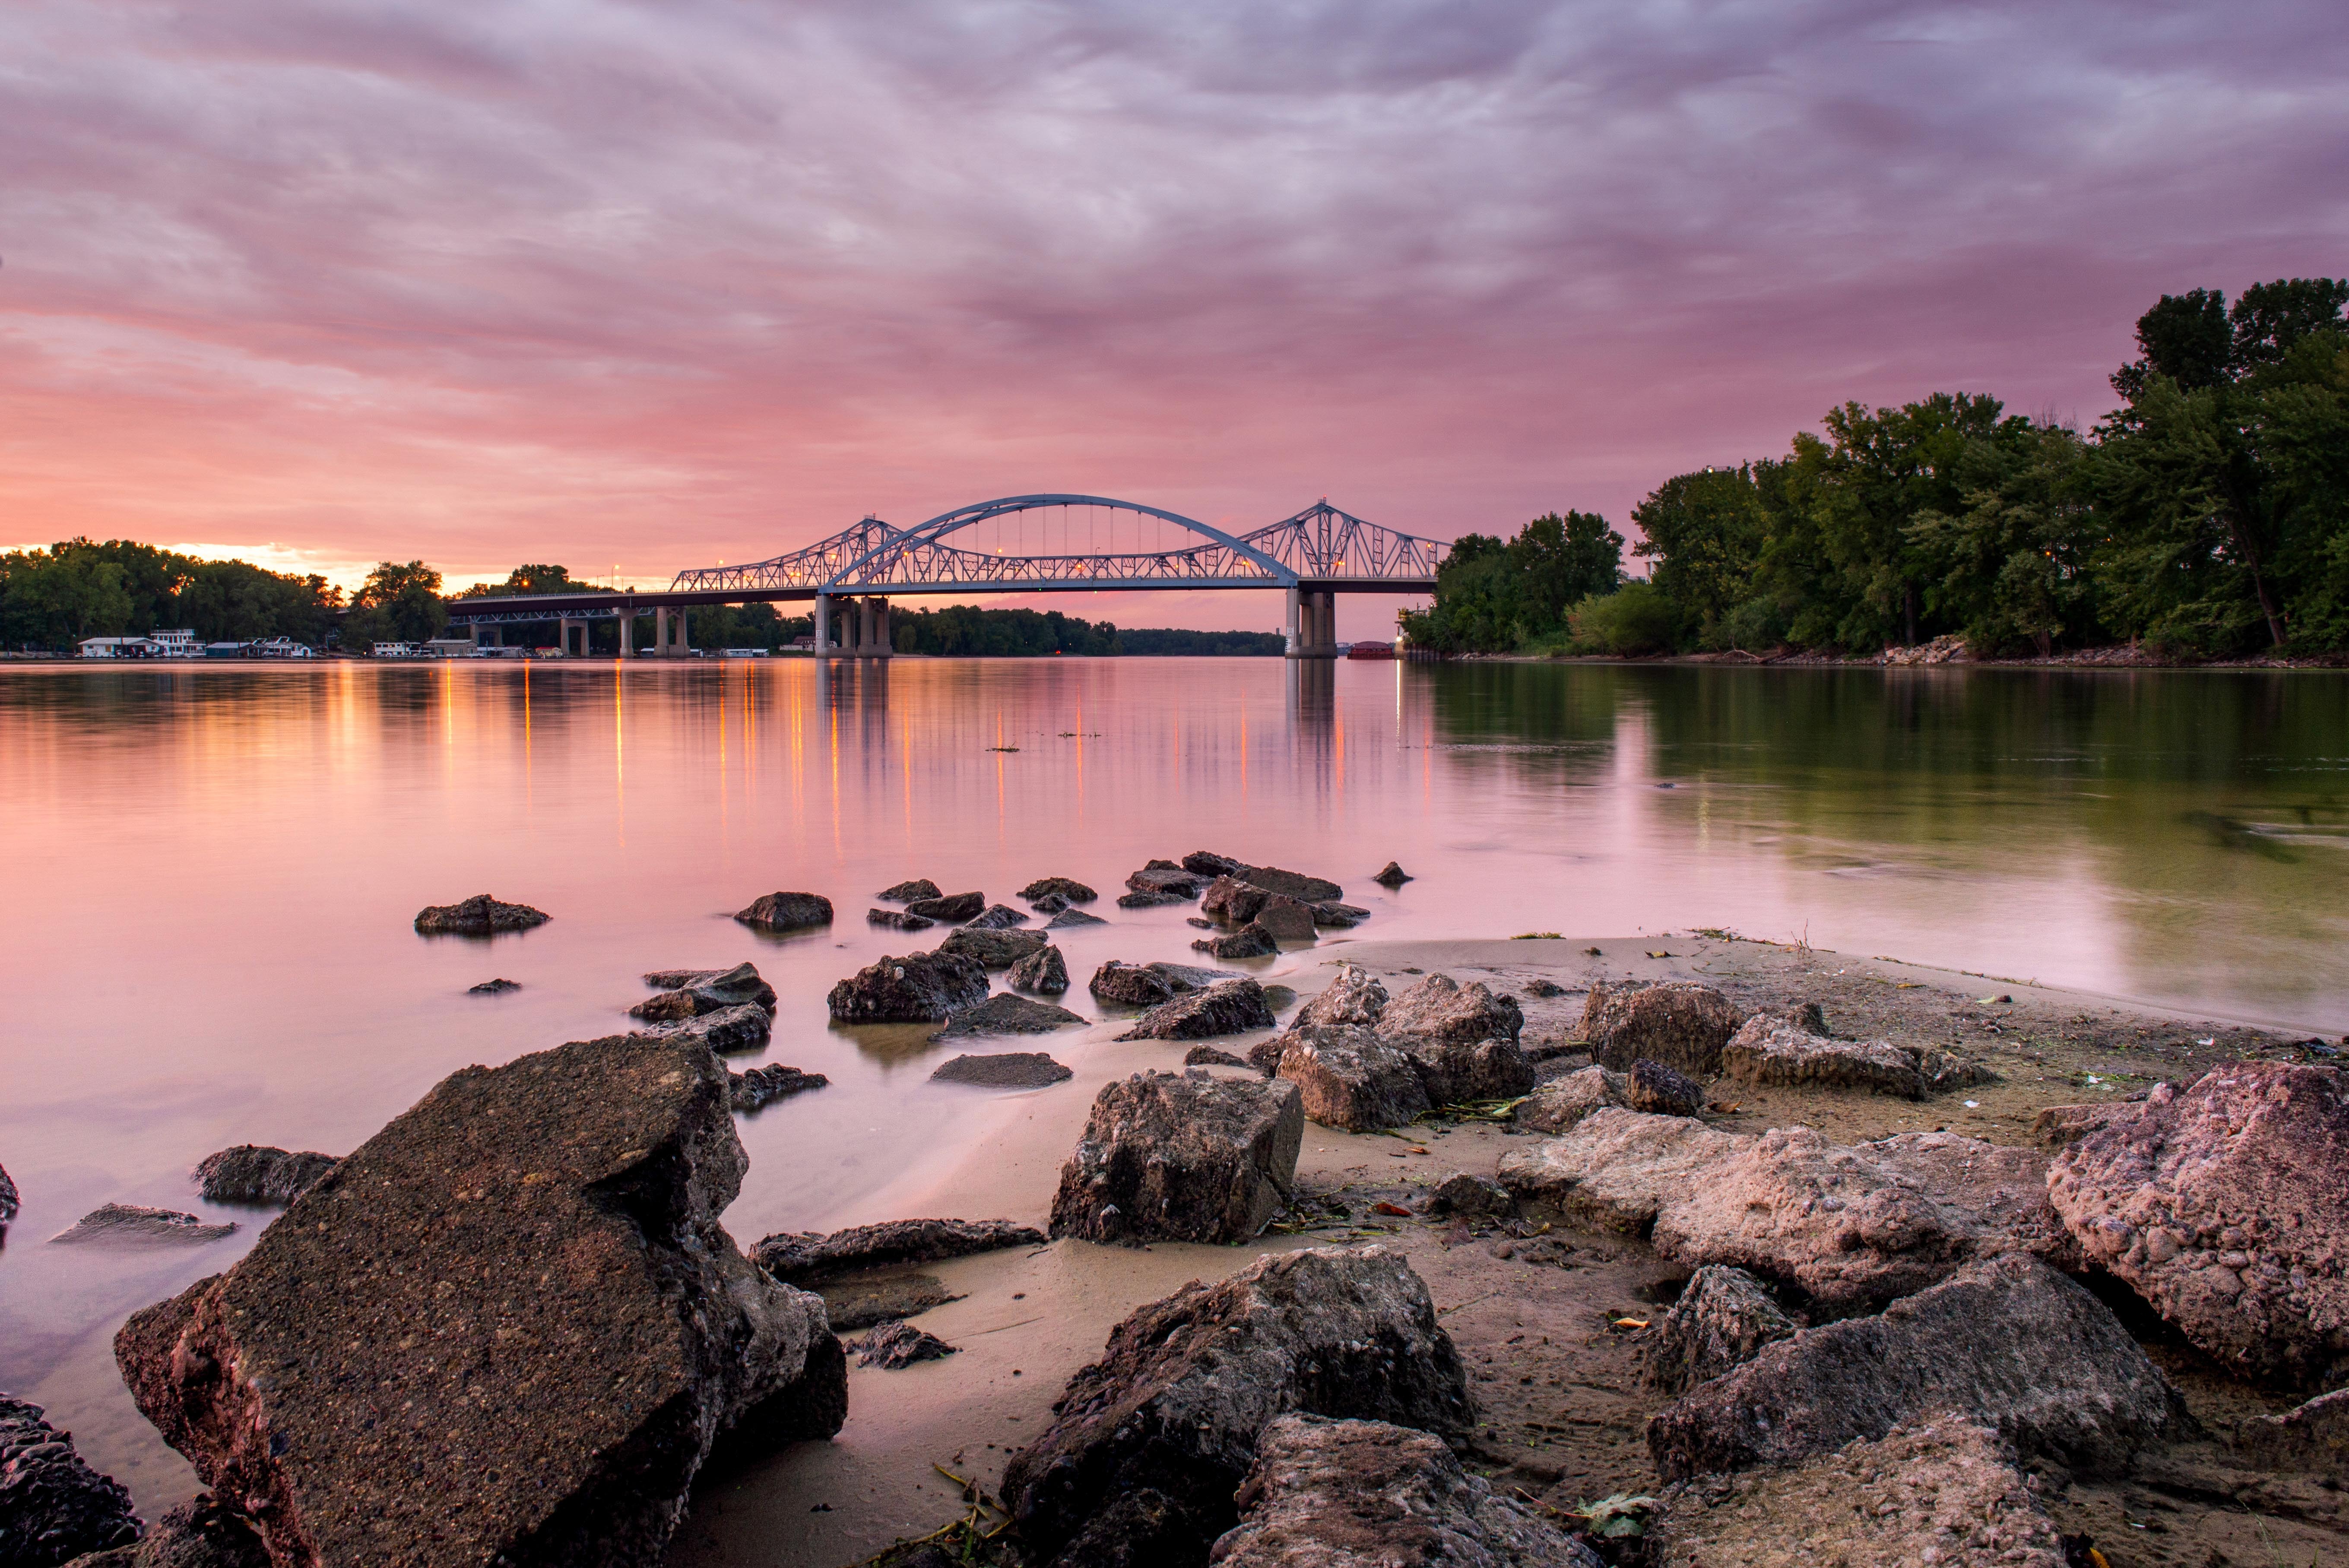
You are at this beautiful wide open vista. You race towards the edge, bring your camera to your eye and snap a photo. You quickly look at the image on the back of your camera only to be puzzled. The scene in front in front of you is beautiful but the photo you just took doesn't look like the scene. It's dull and uninspiring. The reason is, wide angle lenses will make the background appear further away. And without a an interesting foreground subject, your eye doesn't really know where to look. So you need to look around. Find something that you can place in your foreground. It might be a flower, a rock, or even a person. This will help to show the scale of the landscape and also help balance and give some weight to the image. Here's and example of a time I used a wide angle lens properly. The rocks at the bottom give some weight and helps to balance out the image. It also acts as a leading line to help guide you through the image. Both the sand bar and the rock on the left are pointing towards the bridge. The beautiful sunset only helps to complete the image. Without both of these parts, the image wouldn't work as well.
You can also pull out a 70-200 lens. When I come to a place with a great view point, I scan the entire landscape and look for something that catches my eye. Often times, it's the light that catches my eye and the way it highlights certain areas of the landscape.
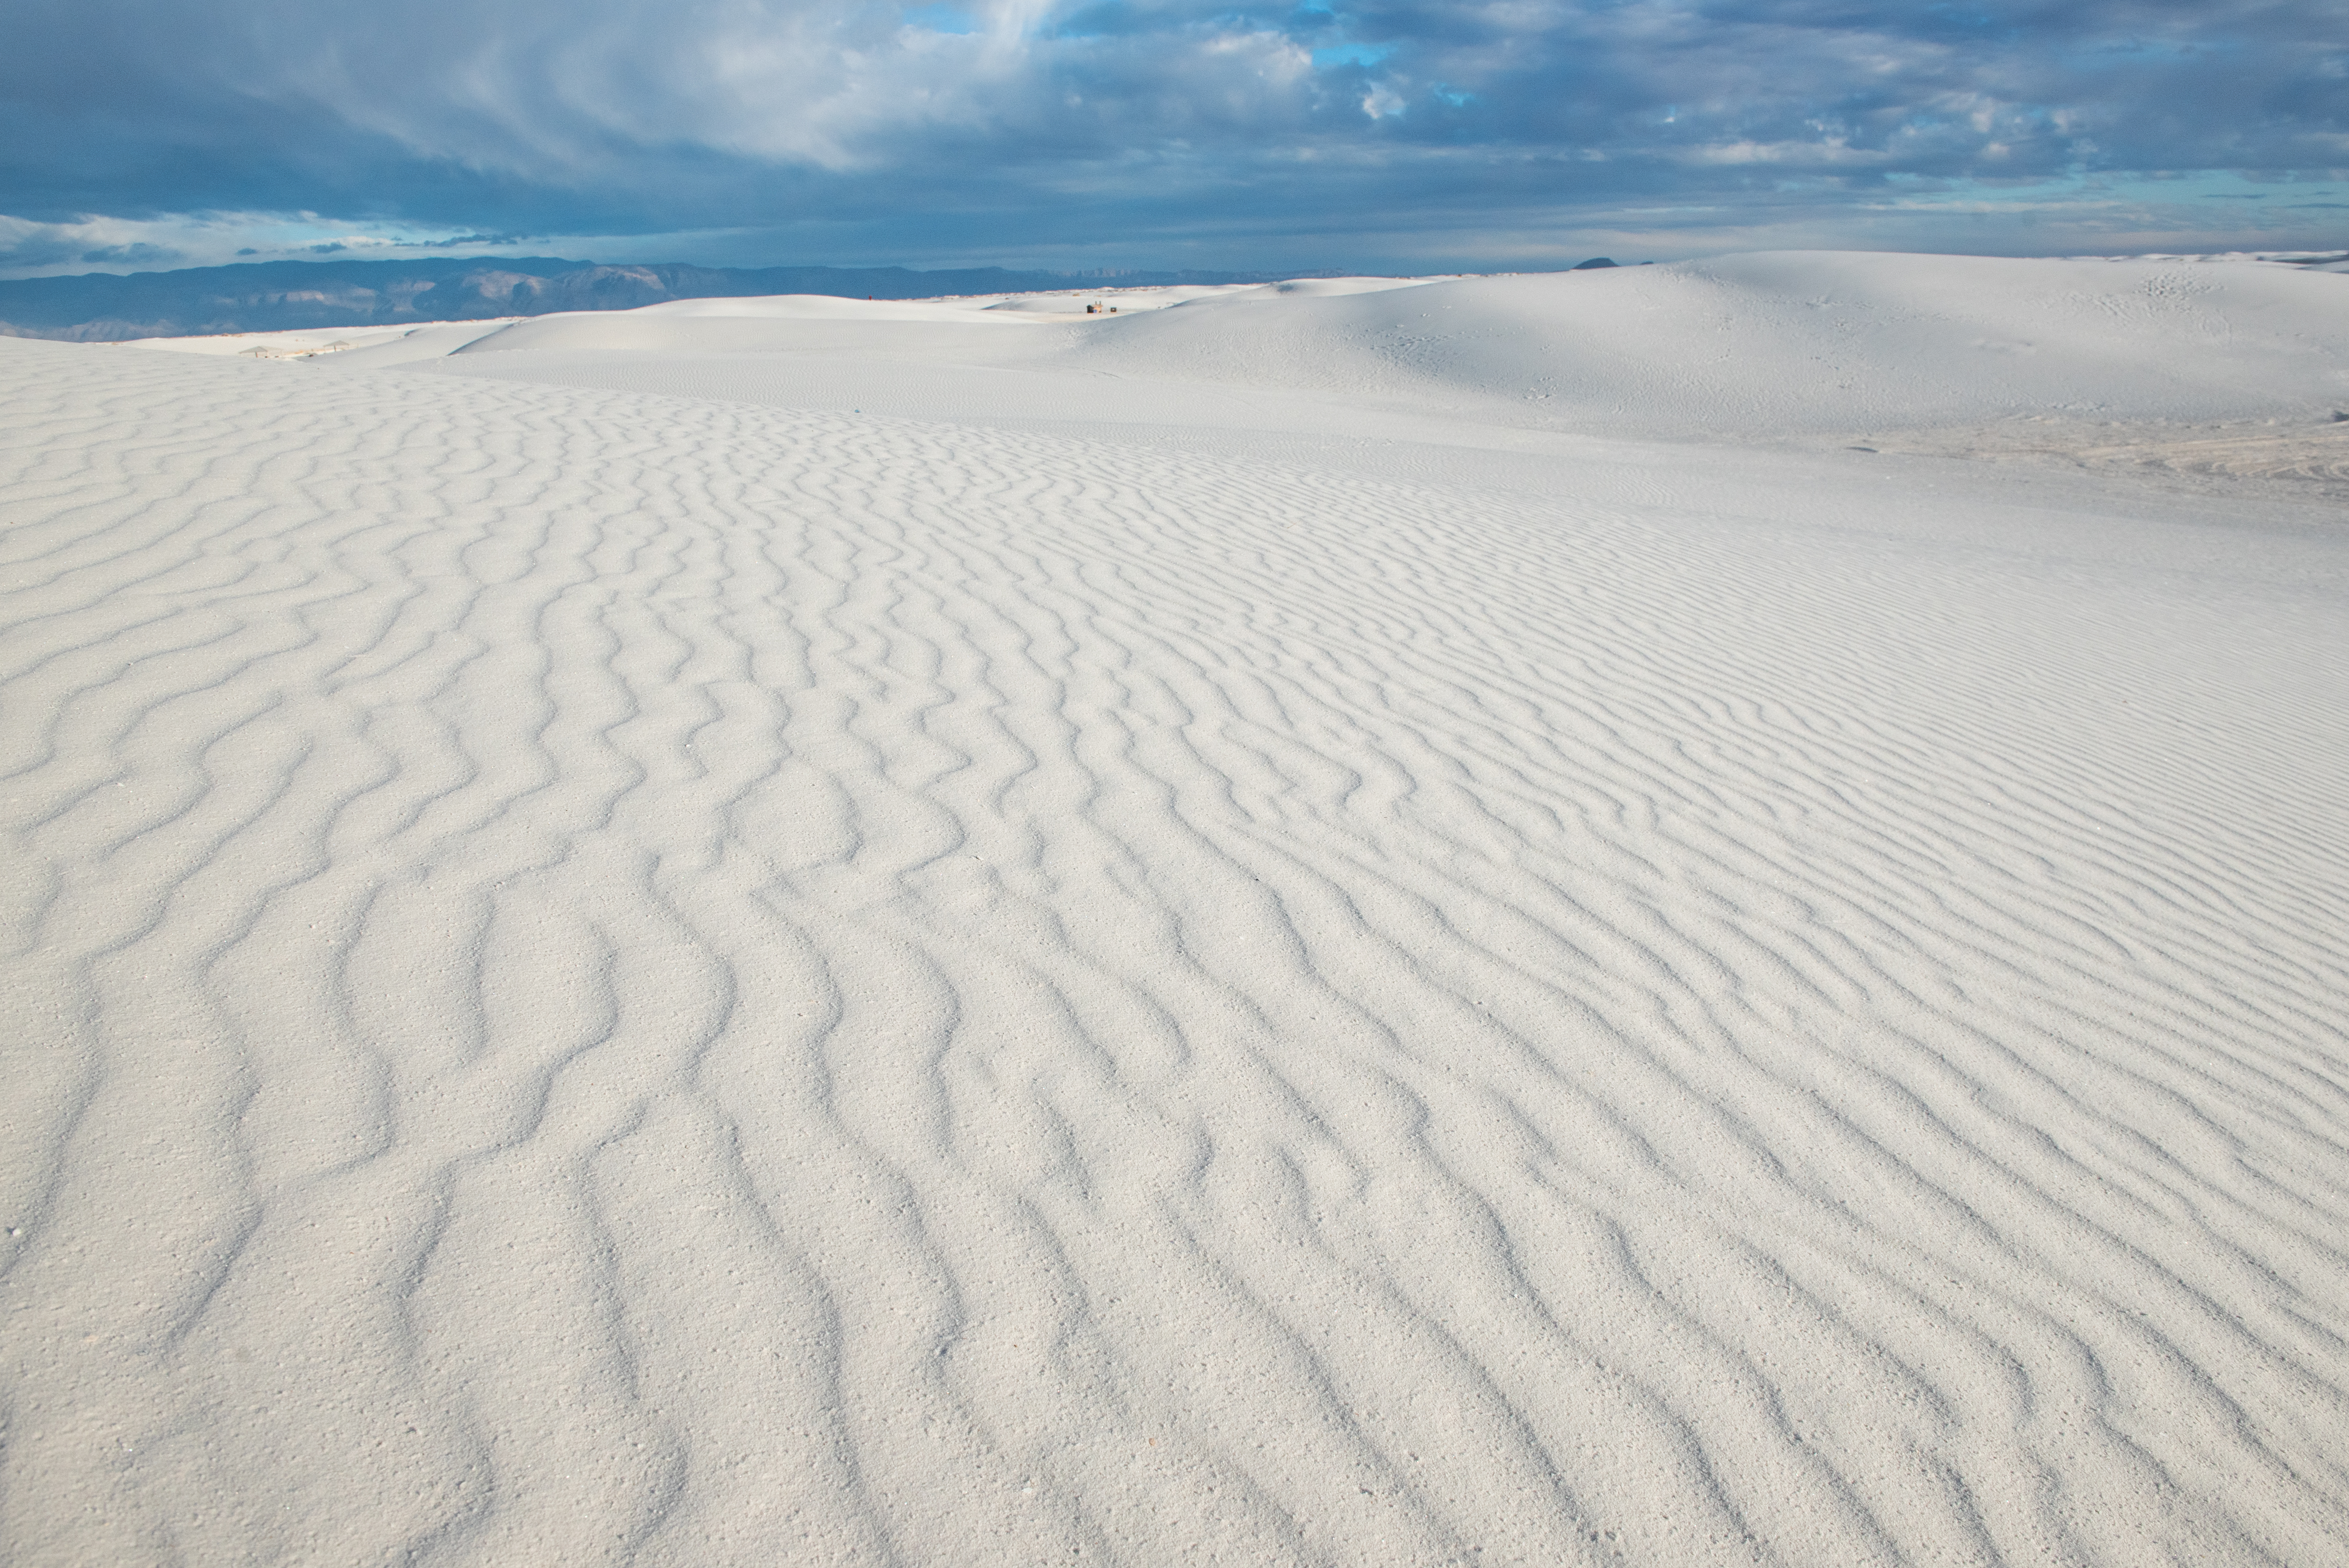
Here's some images from my time in White Sands National Park. The park is absolutely beautiful and unlike any other place I have been. It can almost feel like you are in the middle of snowy field, that's how pure white the sand can appear when the sun is out. Since the park is so wide open, a wide angle lens may not be your best option. It can be tempting to want to shoot wide and included everything in the scene, but that's probably not going to work in most cases. I ended up mostly shooting with my 70-200 while I was there, but did test out some compositions with my 24-70. This image was shot at 24mm.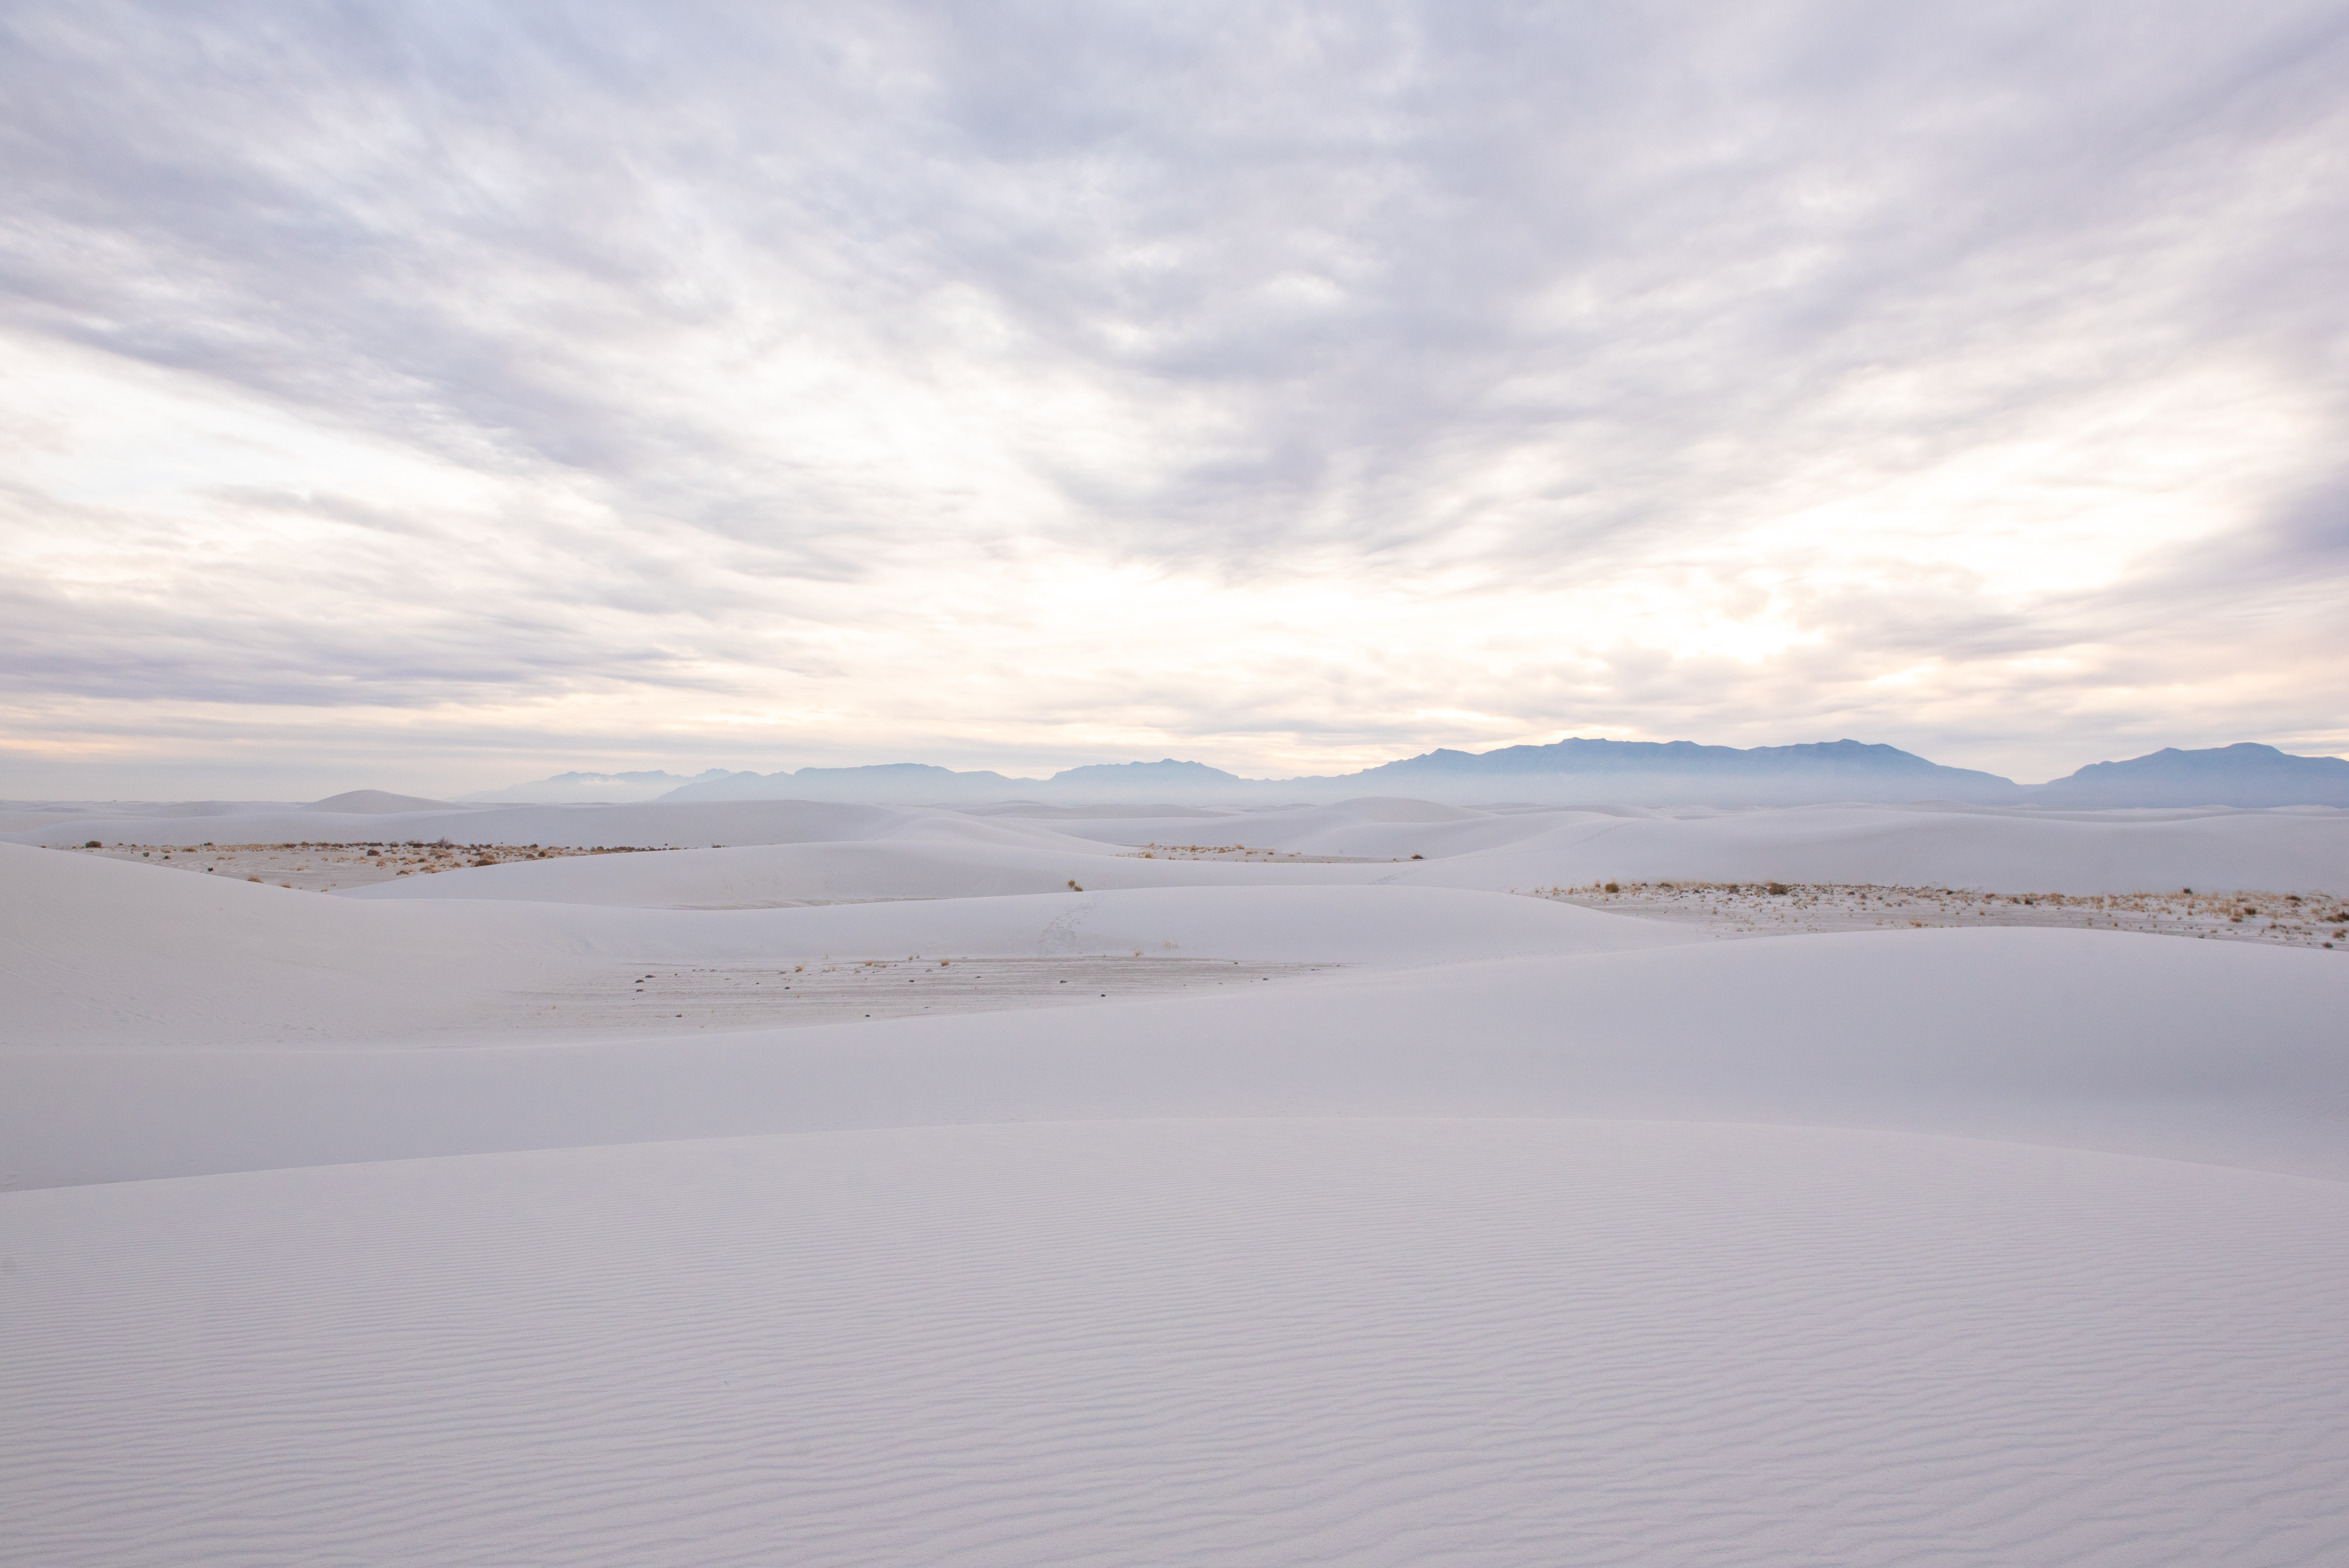
The photo does a decent job at showing off the park, but is lacking something, in my opinion. The mountains in the background kid of disappear and you lose some scale. This is when it's a good idea to bust out the 70-200 lens. While the comparisons may not be totally fair since they were taken on different days and the light was much better on the second day, you can still get the idea.
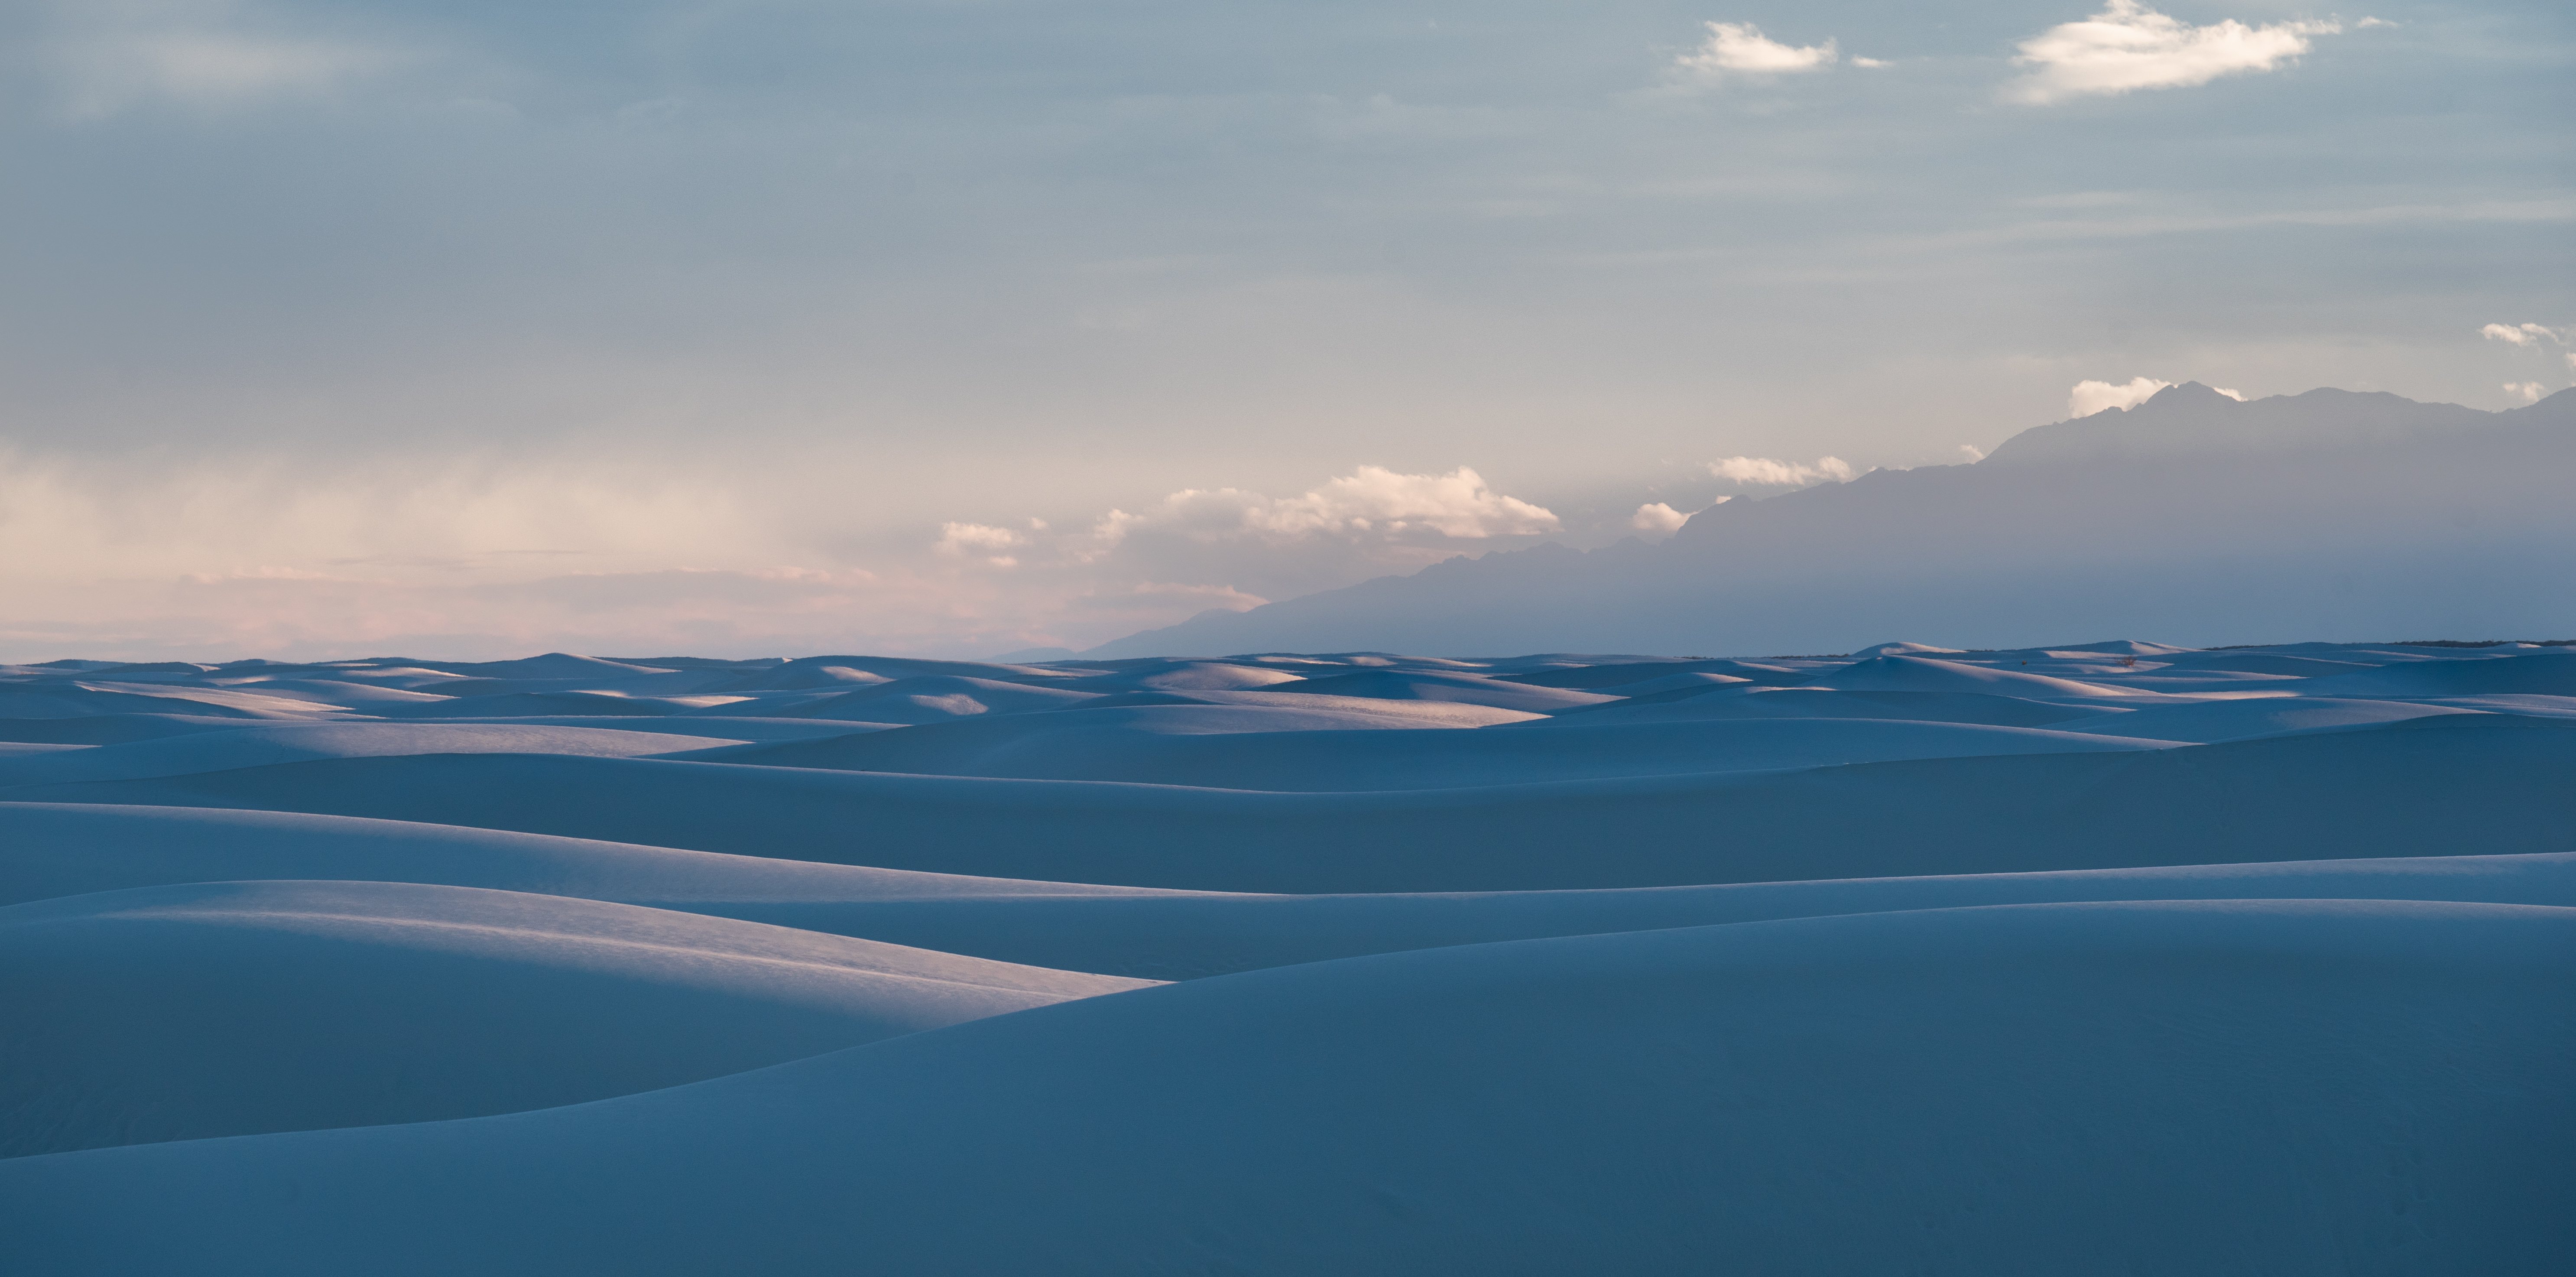
What caught my eye while I was there, was the way the light was skimming across the tops of some the dunes and creating a beautiful contrast between the shadows and highlights. The 70-200 lens also helps to compress the dunes creating a more mystic image. The dunes almost feel like they are these smooth waves in the middle of the ocean. The telephoto lens also makes the mountains in the background appear slightly larger. In addition, the telephoto lens helps to eliminate distracting elements. Often times, it's more important to NOT included objects in the photo. Those objects can be a distraction in the image. The image above may not work as well if there were a scattering of yucca plants spread throughout the field of sand.
While the 70-200 lens works really well in White Sands National Park, you can still use a wide angle lens to your advantage. You just have to be careful on how you use it.
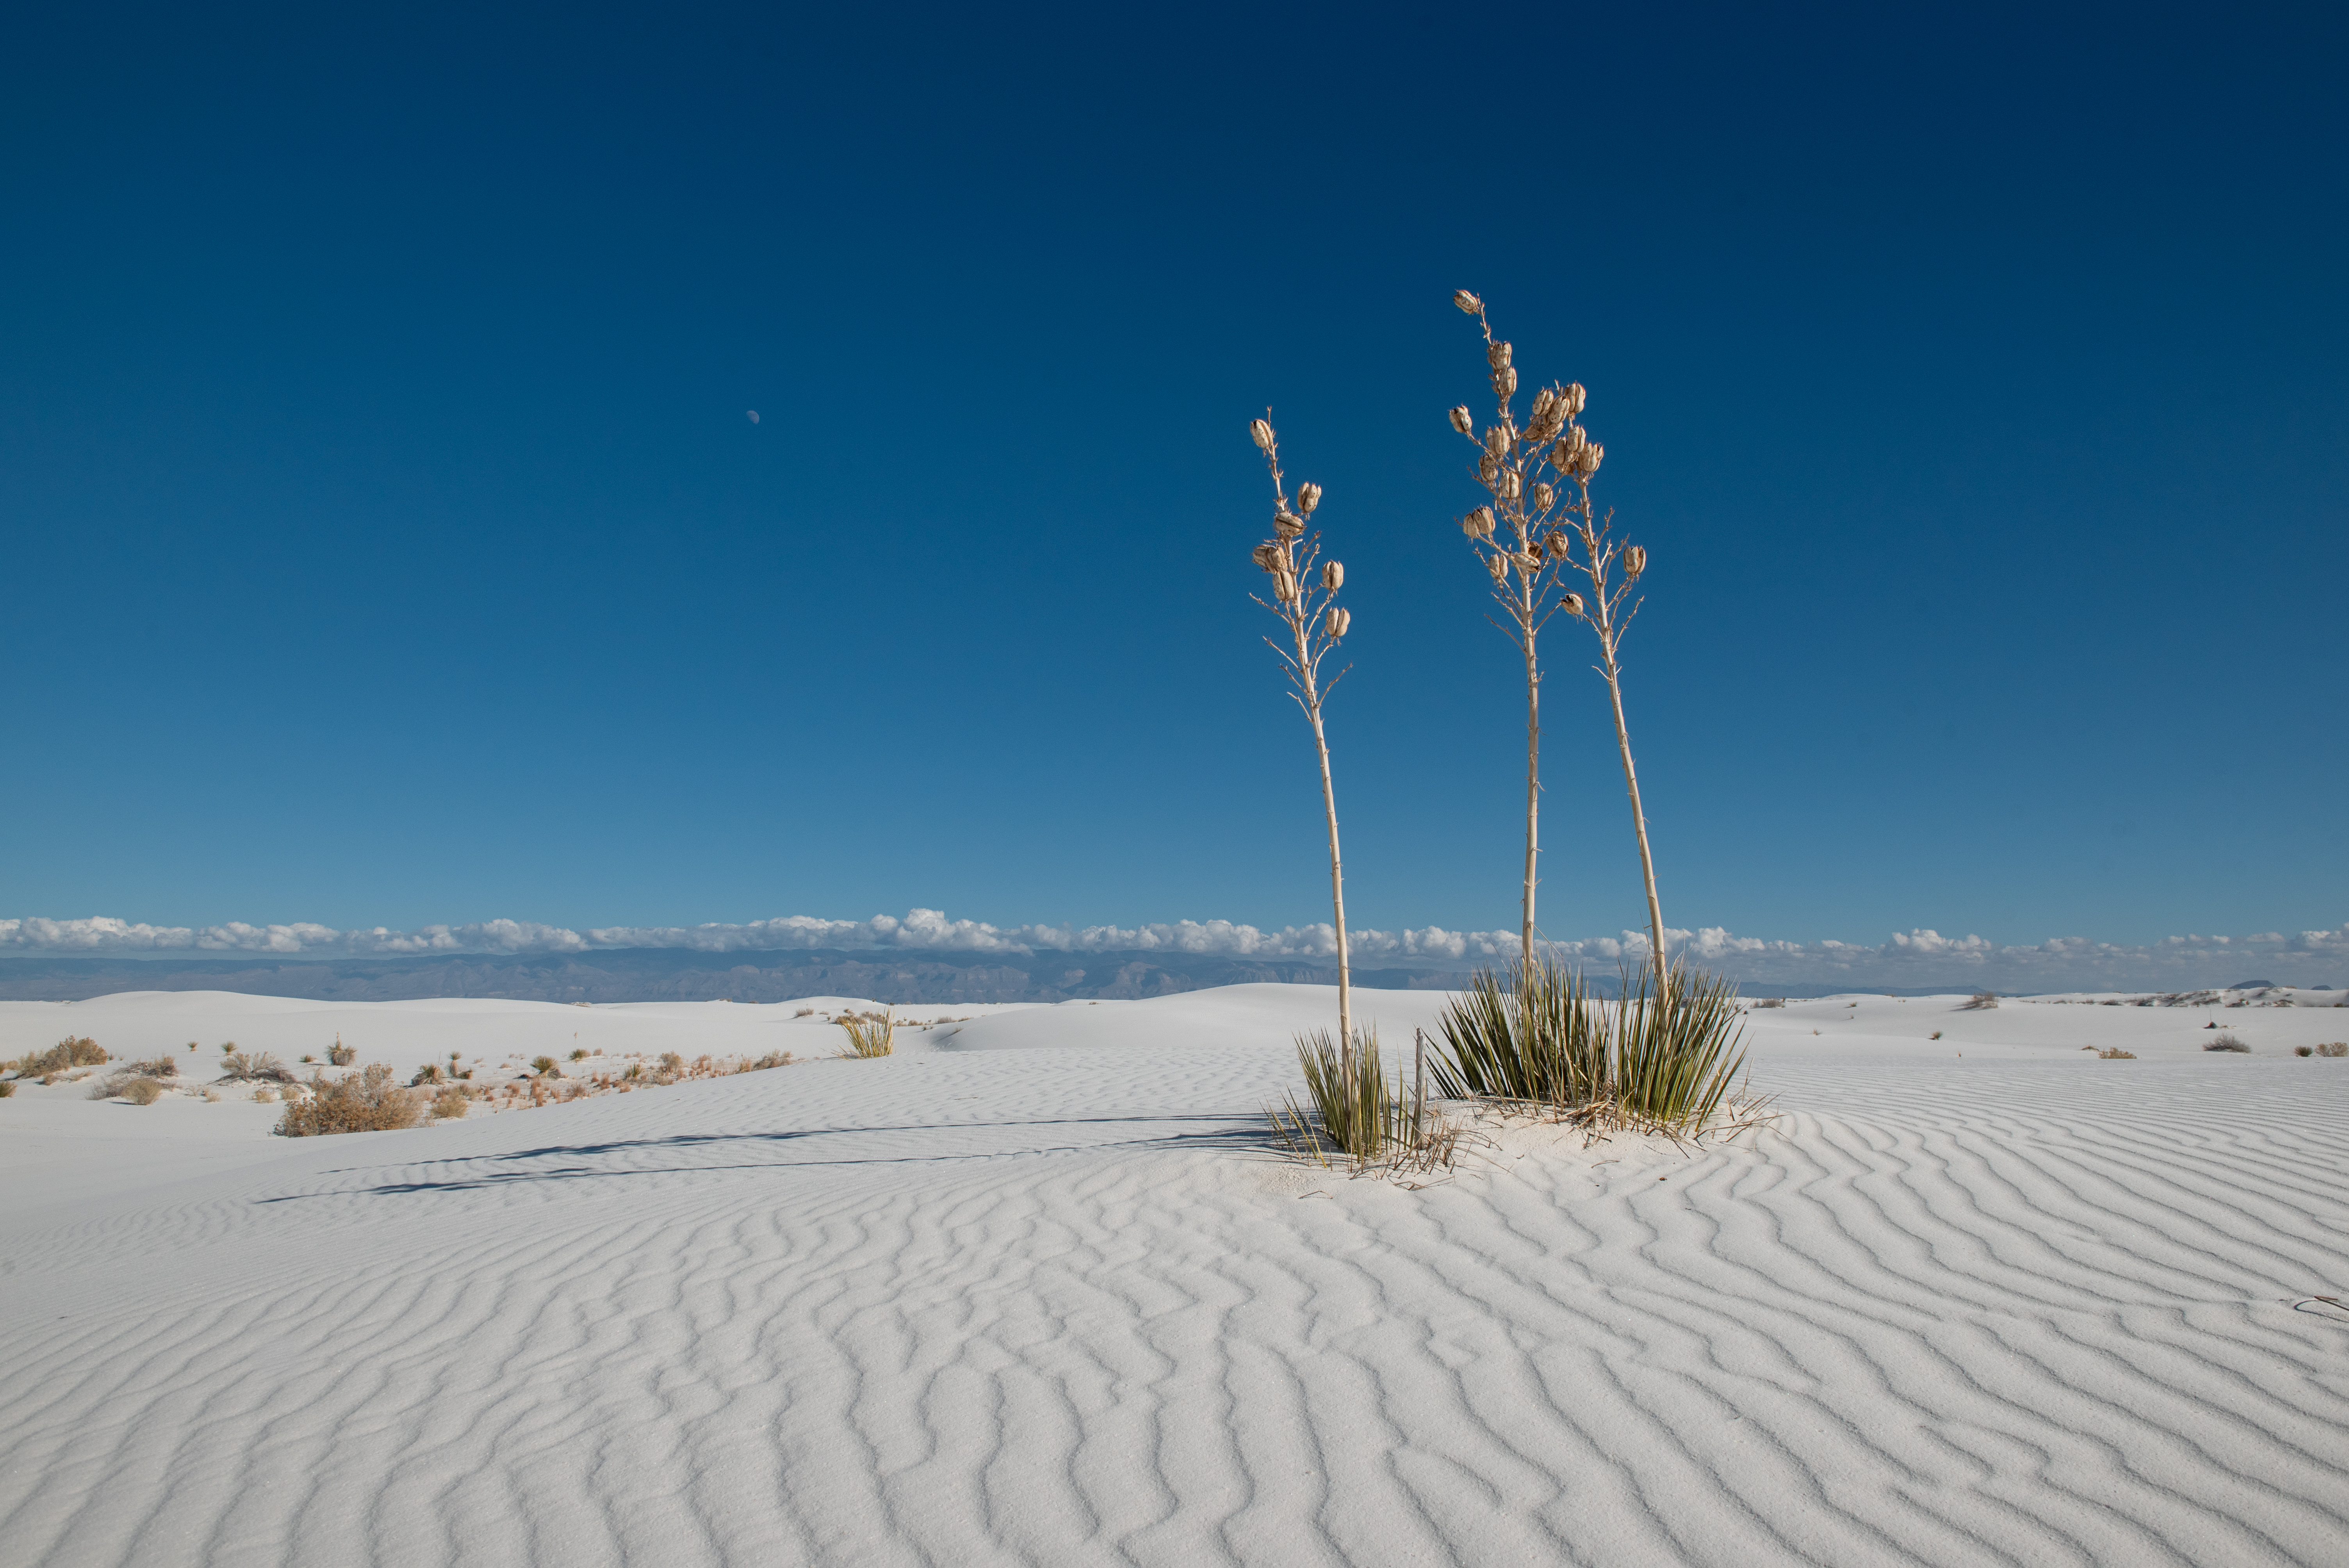
This was shot at 24mm. I used the lines in the sand to help guide you through the scene towards the yucca plant. Unlike the previous image where I didn't include any yucca plants, for this image I wanted to feature the plant since they are scattered throughout the park. By using a wide angle lens, I was able to put the focus directly on the yucca plant. Or you can just focus solely on the sand itself and the patterns created by the wind.
My best advise to just to practice and play around. Start with the wide angle lens and see what works and what doesn't. Then move on towards the a telephoto lens. To me, lenses are like tools in a tool box. Can you pound a nail in with a wrench? Sure, but it's much more difficult. A hammer is a much better choice. ( Same goes for your choice of lens. Just don't use your camera or lens to pound in any nails.)
Lastly, properly editing the image can also greatly effect the image. Now everyone has their own style and I don't want to go too much in detail about how I edit in this post, but I usually tend to keep my edits simple. I tend to add some contrast, bump up the shadows, bring down the highlights, use the saturation and vibrance sliders to a minimum, etc.. Editing can make or break the image. By adding too much saturation, the image can look like a mess of colors. I rarely spend more than 15 minutes on an image. I've found that if I spend a lot of time editing the image, more often than not, the image won't turn out. Sometimes, I can edit a photo in just a minute or two, but usually it will take about 5-10 minutes per image. This is both a result of me being familiar with the software and knowing how to edit, and also my editing style. If you are a beginner, it may take longer, so don't get too frustrated if it takes longer.
By following these tips, you can help transform your images to something more impactful.