
I have mentioned the old tutorial I created some fifteen years ago or so. It did enjoy some attention to the tune of (at last ability to count) 6 million+ hits. At the time I created it, I had no forethought nor wits enough to monetize it in any way, though I really never predicted that it would become such an inspiration to other creators. I am grateful that it was. I was once asked to autographed a pizza box (not greasy) for a delivery person who recognized my oddly-spelled name from the published version. Too much!
Athena has taken charge of a lot of my marketing and my website. I bought my domain, phelyx.com back in 1993 when the internet was still being debated as being a potentially inconsequential resource. Yes. There was a time when folks said, "I'm not sure if this World Wide Web thing is going to last." Well, one might think that I am still one of those folks given the evidence of a very poorly managed and maintained website. There was a time when I was top-ranking in search engines purely due to the age of the site. After a site-host switch back in 2018, a lack of education, and a failure to get it listed in a number of important directories, I don't even show up at all in a Google search for "Denver Magician".
Ohhh, Nooooo!
This is not good.
I will be making efforts to reestablish my web presence by whatever means I am directed. Things have changed. That tutorial was something I was asked to create for a site called Stencil Revolution. It was a grand space that featured talent from all over the world. It was populated by street artists and included such names like BANKSY. There was a physical book published that featured a lot of us, including me. As time went by, the Stencil Revolution site ended up being sold off and the original location of my tutorial was deleted. By then it had been copied (mostly unattributed so I am glad I at least branded the photographs with phelyx.com) into other websites, blogs, and a lot on Pintrest. At one time you could have found it in a couple of hundred places on the web. Time moves along.
I decided that I should put it back up somewhere and where better than here, in the Phelyx Coffee Club‽
So, my friend, here it is, unedited, just as it appeared in Stencil Revolution. The photographs above are all referenced in the tutorial.
My thanks for being here! <3
--------------------------
My name is Phelyx and I have been asked by several Stencil Revolution members to produce a tutorial for my bleaching process. Sometimes, I am called the bleach guy. I am honored by both. Here is my Bleaching Tutorial, exclusively for Stencil Revolution members.
In 2002, I was hired by a small clothing company to invent a process by which we could produce images on garments that would be more “tattooed” into the fabric than screened on. I immediately thought about bleach and began two years of research and testing. I worked with chemists, fabric manufacturers, and artists. I wrecked my studio, my clothes, and my lungs. I wasn’t paid nearly enough for this.
Chemically, to achieve different values, I worked with retardants to slow the process of the chemical’s effects, I watered down mixtures, I used “stop-baths”, dehydrated bleach crystals… you name it. I also worked with all kinds of different fabrics, 50/50 blends, natural cottons, many textures and naps. I experimented with different application processes including brush-on, sprays, mists, atomizers, airbrushes, and even a gel-bleach, I created, that was screened on. The most frustrating part of this entire experience was to arrive, full-circle, at the beginning. Sometimes the simplest method is the best.
So, here is the big secret, just for S.R. members.
Finesse. That’s it.
I have finally completed this simple tutorial and am pleased with the results. This is created for the experienced beginner but should almost equally serve the beginner and the advanced stencil artists.
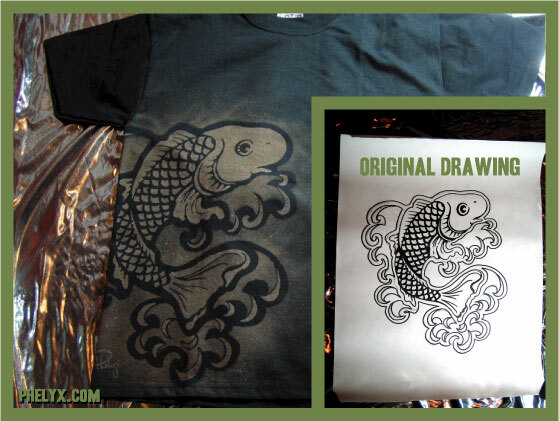
This Japanese Koi design was created specifically for this tutorial. (my original drawing in fig. 1.) I wanted to create and instruct with a relatively simple design that translated well into a two stencil work. It is based on traditional Japanese Koi artwork (but I really just made it up, so I hope it’s more recognizable than it is offensive) due to the popularity of the symbol and design in historic and modern tattoos. Of course my bleaching work began when I was asked to “tattoo” fabric. The Koi also symbolizes luck, and I can use all of that I can get.
There are a few basic need-to-know items and suggestions that I can offer.
First: bleach will not work on most synthetic fabrics. You will need natural fabrics. The good news is that even the cheap tee-shirts are generally 50/50 Cotton and Polyester, and they will work just fine. 100% cotton will also work well, HOWEVER, bleach really weakens the material. If you get big, wet drips of bleach on 100% cotton, they will quickly develop into holes in the material. I do know that, for at least one clothing company, this is actually the desired effect but I prefer the stronger 50/50 blends for bleach designed clothing.
Second: I use Duralar material (.005) to create my stencils. Cardboard will only soak up your bleach and become a mess. Duralar is available at your art supply dealer or online and is only about $2.50 USD for a 32 X 40” sheet. It is thin, plastic, and clear and you will get a lot of mileage out of each of the stencils you cut out of it.
Third: Cheap bleach is fine. It is still a toxic chemical. Wear a respirator or work in well ventilated areas, or both. Don’t wear anything you love. You’re spraying bleach.
Fourth: Empty your spray bottle after you’re done. If you store bleach in it, it will expand due to softening of the plastic and gasses from the reaction between the chemical and the plastic bottle. This can be messy and dangerous.
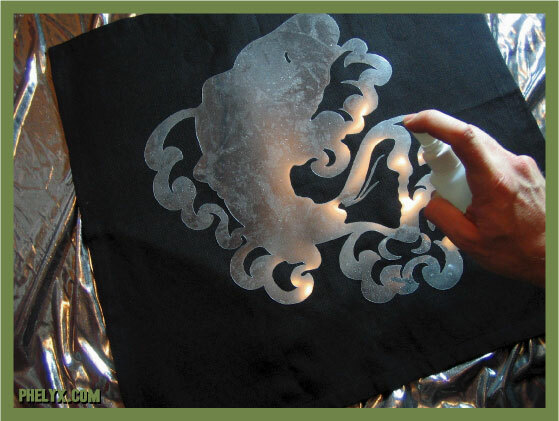
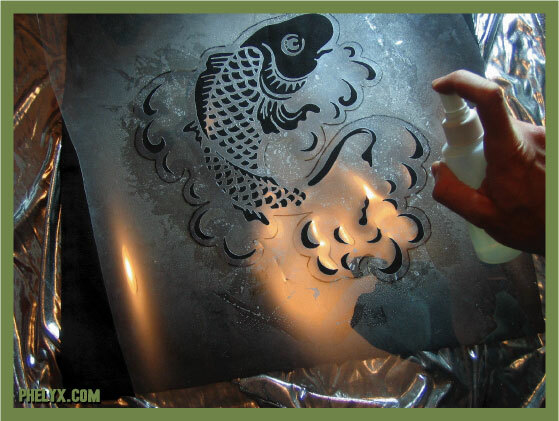
In the photographs, I have tried to show you the spray bottle I use. It is a very common spray bottle and inexpensive (about $1.50 USD).
With stenciling bleach onto dark fabrics, you have to think in the negative. This is opposite the general process of stencil work with spray paint or roll-on paints and inks. The light colors are going through the stencil and the dark areas are being blocked by it. Otherwise, this process is darned close to the spray paint stencils more commonly created.
For this stencil, I created the stencil for the half-tone layer to be applied first. On the back side of the stencil, I used a repositionable spray adhesive. This is a 3-M product and makes the stencil sticky but easily removable. It leaves no residue on the substrate (fabric). This is used to prevent under-spray for those clean, crisp lines and edges. It is important to also select a spray angle with your wrist position and stick to it. The angle of your spray should remain consistent throughout the even application. If you roll your wrist at all, you’ll risk under-spray and inconsistent application.
In the second photo, you can see the shape of this stencil and compare it to the original drawing to see the areas I selected for the half-tone/lighter value layer. I also designed it to have a half-tone halo that fades into the background to enhance the outline. Spray this layer with the same, full-strength bleach but use a light mist for application. This mist will not be very wet. It is not to soak into the material. It is a fine mist that will lay atop the fabric and cause the effect. You will have to wait a few moments for the reaction. It will develop like a Polaroid. You can leave the stencil on for this effect in case you want to add a little more to make it lighter.
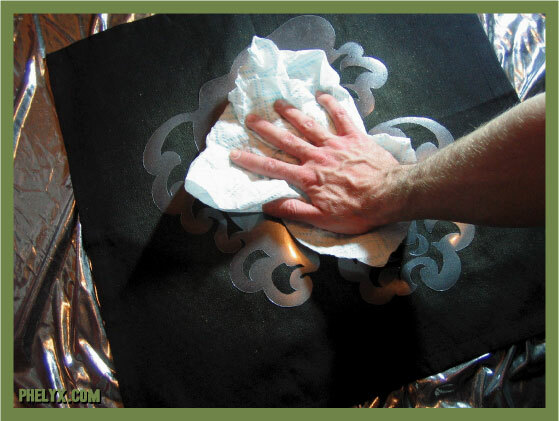
In the third photo, you see me using some paper towel to pat the stencil. This is to prevent droplets and drips from the chemical that is beaded up on the stencil from dripping onto the fabric when the stencil is slowly peeled off.
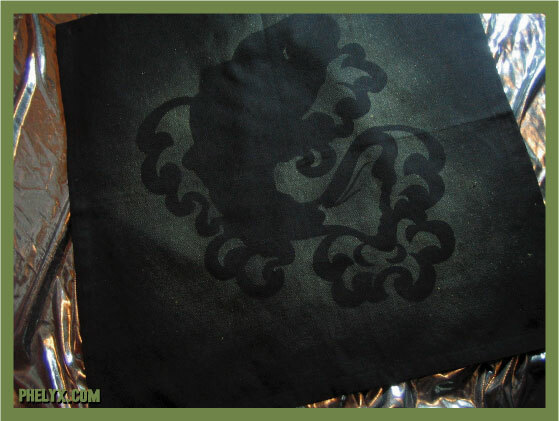
The fourth photo shows this layer completed and fully developed.
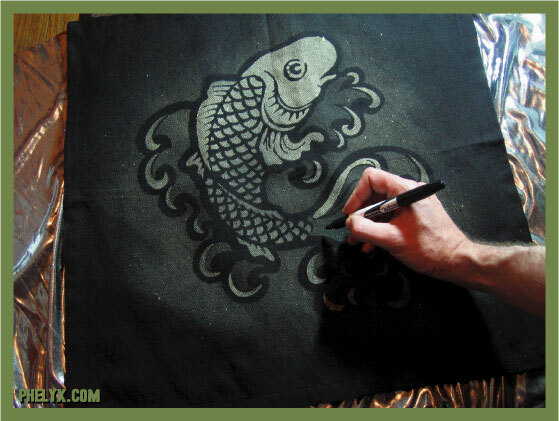
In the fifth photo, the second stencil is applied. You will see a black marker line that is drawn on the reverse side of the stencil for alignment and registration. It is drawn on the back because the bleach will erase it from the front. I add the island stencil for the eye and it has also been sprayed with repositionable spray-adhesive. You can see in the first layer, I included a little line, that is actually sprayed as part of the design, for registration of this separate eye stencil. This whole layer gets the same, full-strength bleach. A heavier application is employed to achieve a lighter value. IMPORTANT: this is still not soaked. If you soak it, it will saturate the material and seep under your stencil. You will lose all your detail if you spray too heavily. Keep it consistent. You can leave the stencil in place until it develops to see if you want to apply more bleach to lighten it.
As with most stencil work, you will almost never get the stencil to properly re-register/re-align for a second attempt. This means you really can’t expect good results from trying to reapply the stencil for another attempt. Try your best to get each layer in one shot.
In the sixth photo, I am again blotting the stencil with dry paper towel to prevent drips and beaded chemical from running onto the material.
I cheat sometimes. In the seventh photograph, I am using a Sharpie fabric marker (this has dye instead of ink) to add three details; the nostril and two “V’ shaped lines in the tail.
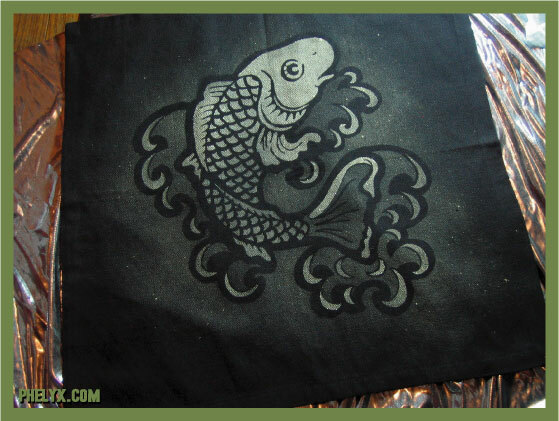
The last photo shows the completed design. I used a black cotton napkin for this, instead of a tee shirt, so the photos in the tutorial would be clear.
You should know that when the bleach dries, it may crystallize. These tiny crystals are still dormant bleach. If these are re-hydrated, they can continue to bleach the fabric. I highly recommend running the finished piece in a dryer to beat these crystals out of the fabric before getting it wet by washing or whatever else. Be careful washing this with other clothing until it has been beaten and rinsed once.
Now, I know you may feel cheated that I did not disclose some amazing and secret technique but remember that I spent years experimenting with every other imaginable process and that this is the best, most effective, and easiest technique. I did give away my best tips. Don’t tell people, however. Let them believe that it is more complex and laborious. Let’s keep it between us.
Finally, huge respect for Stencil Revolution, the people who work hard to maintain it, and all the amazing artists in here. There are few places, even on the Internet, that you can find such amazing talent.
Your pal,
Phelyx
_________________
someone needs to invent some kind of splint for stencil cutting fatigue of the index finger.